Getting started with Orangescrum
We will walk you through the steps and get you started on your first project in OrangeScrum. Let us start with creating a new project and adding users to it. Then we will show you how to add tasks to the project or if you have tasks in other application, we will guide you on how you can import existing tasks into OrangeScrum.
Create and Assign Project:
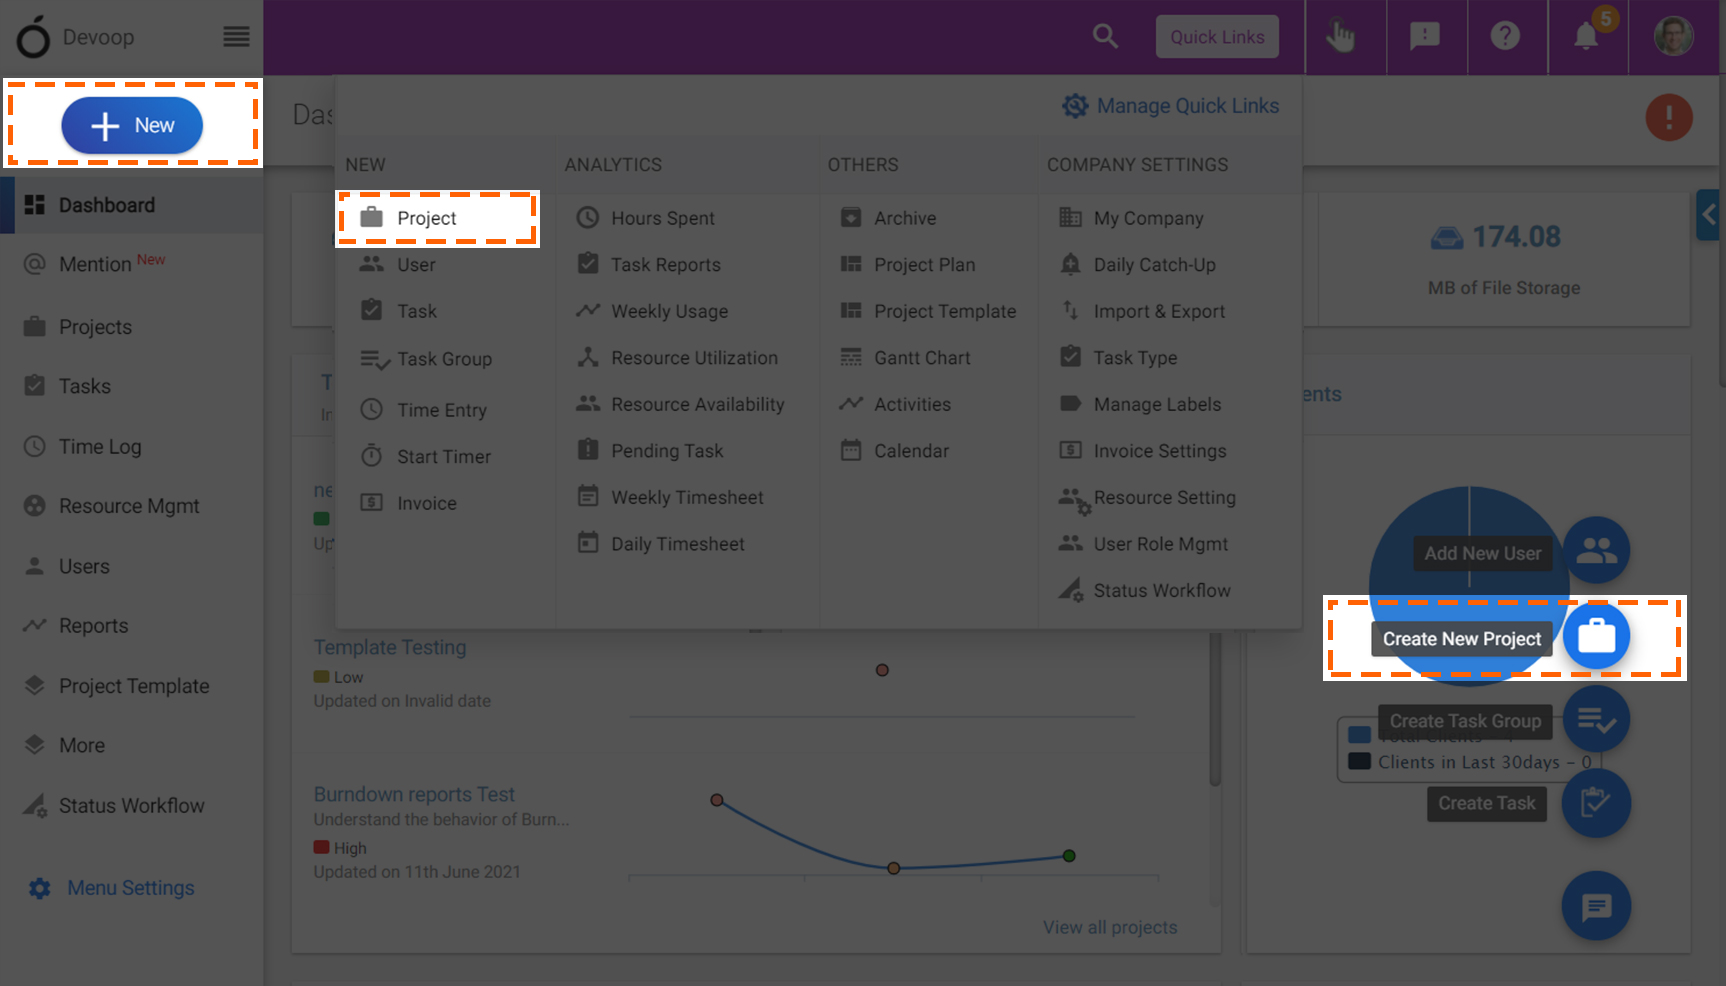
To create a new project, go to “+Quick link” Menu present on the top right-hand side of the screen and click on “Project” submenu to create a new project. You can also create project in two different ways as shown in image below.
While creating a project, you will need to enter a suitable project name, a short name for the project (mandatory), invite users by entering their mail ids separated by a comma, estimated hours of the project, start date and end date of the project in the respective fields.
Defining a short name for any project makes it easy to remember and access quickly.
For e.g.:
Project Name – My Project Short Name– MP Start Date – 06-01-2015
Add User – usermp@gmail.com, usermp2@gmail.com Estimated Hours– 4hr 30mins
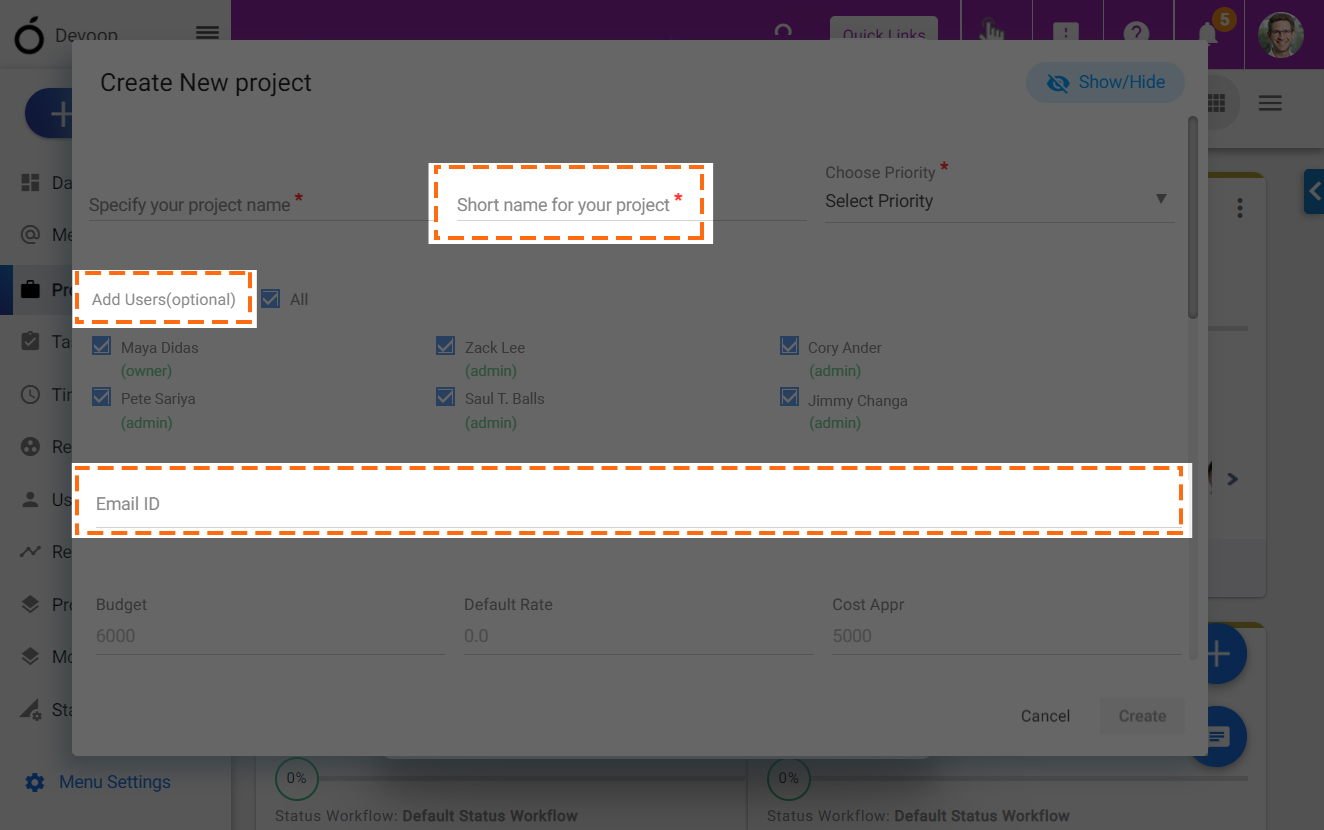
Once you have created the project, let’s add the user to this project for easy assignment of tasks. You can add users while creating a new project as displayed in the above image. To Add New Users, enter their email address and separate them with “,”.
You can add new users to any existing project by simply clicking on the menu over the specific project box (as displayed in the below image). It will show 4 action items and click on “Add User” link. Select user(s) form the pop-up screen, click on save button to save the data. If the user does not exist on the system yet, then invite the user to OrangeScrum by clicking on Add New user button on the top right corner.

Invite User:
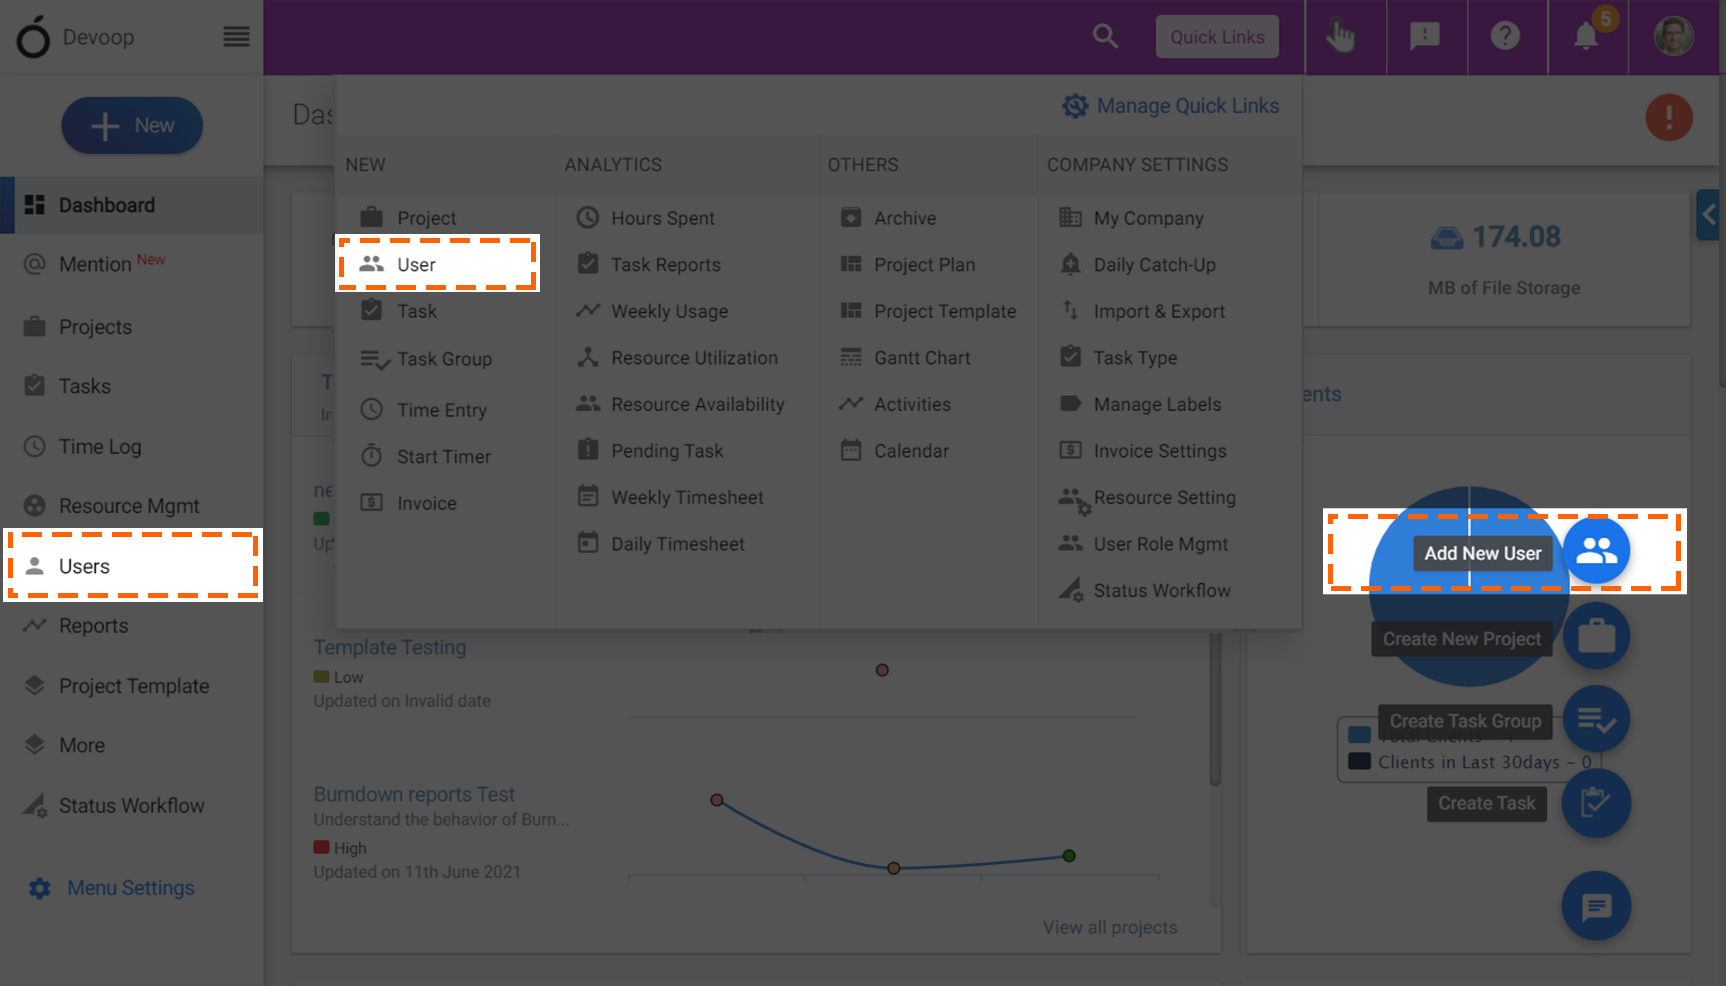
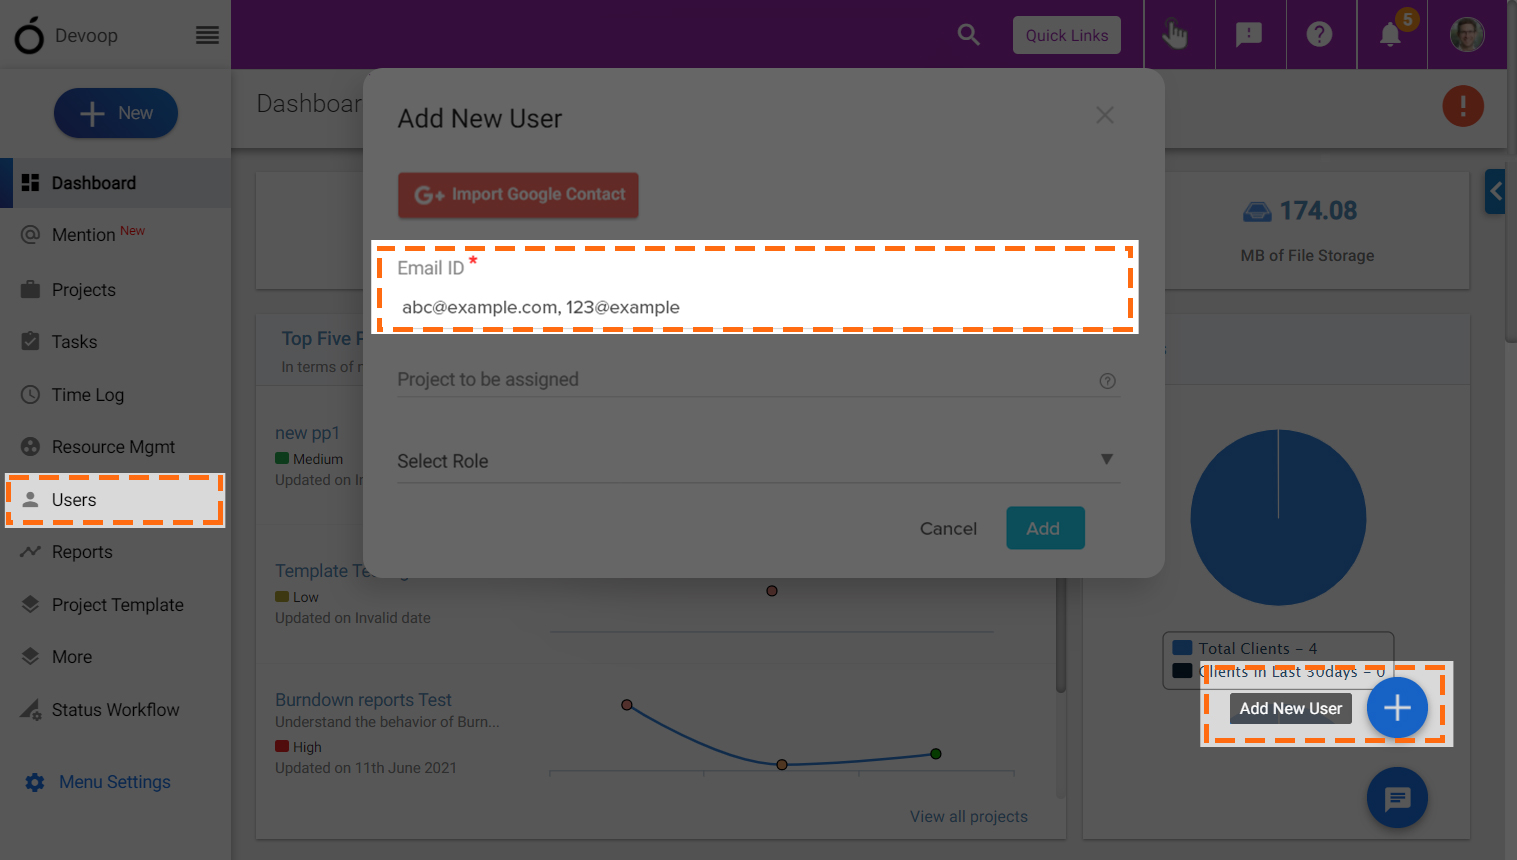
Inviting new users to OrangeScrum is much easier. Click on “User” from “Quick Links” or Hover on ‘+’ icon “Add New User” from Dashboard or User page. Then enter the email address of the new user you want to invite/add & click on Add on the Add New User pop window. You can assign/ add the new user to a specific project by selecting any project.
Note: Use the comma to invite or select multiple users.
You can mark the user as Client or can grant Admin access to the user. At anytime you can Edit the user profile or Disable the user.
Note: If you Disable then the user can’t log in to your OrangeScrum account anymore.
Create or Import Task:
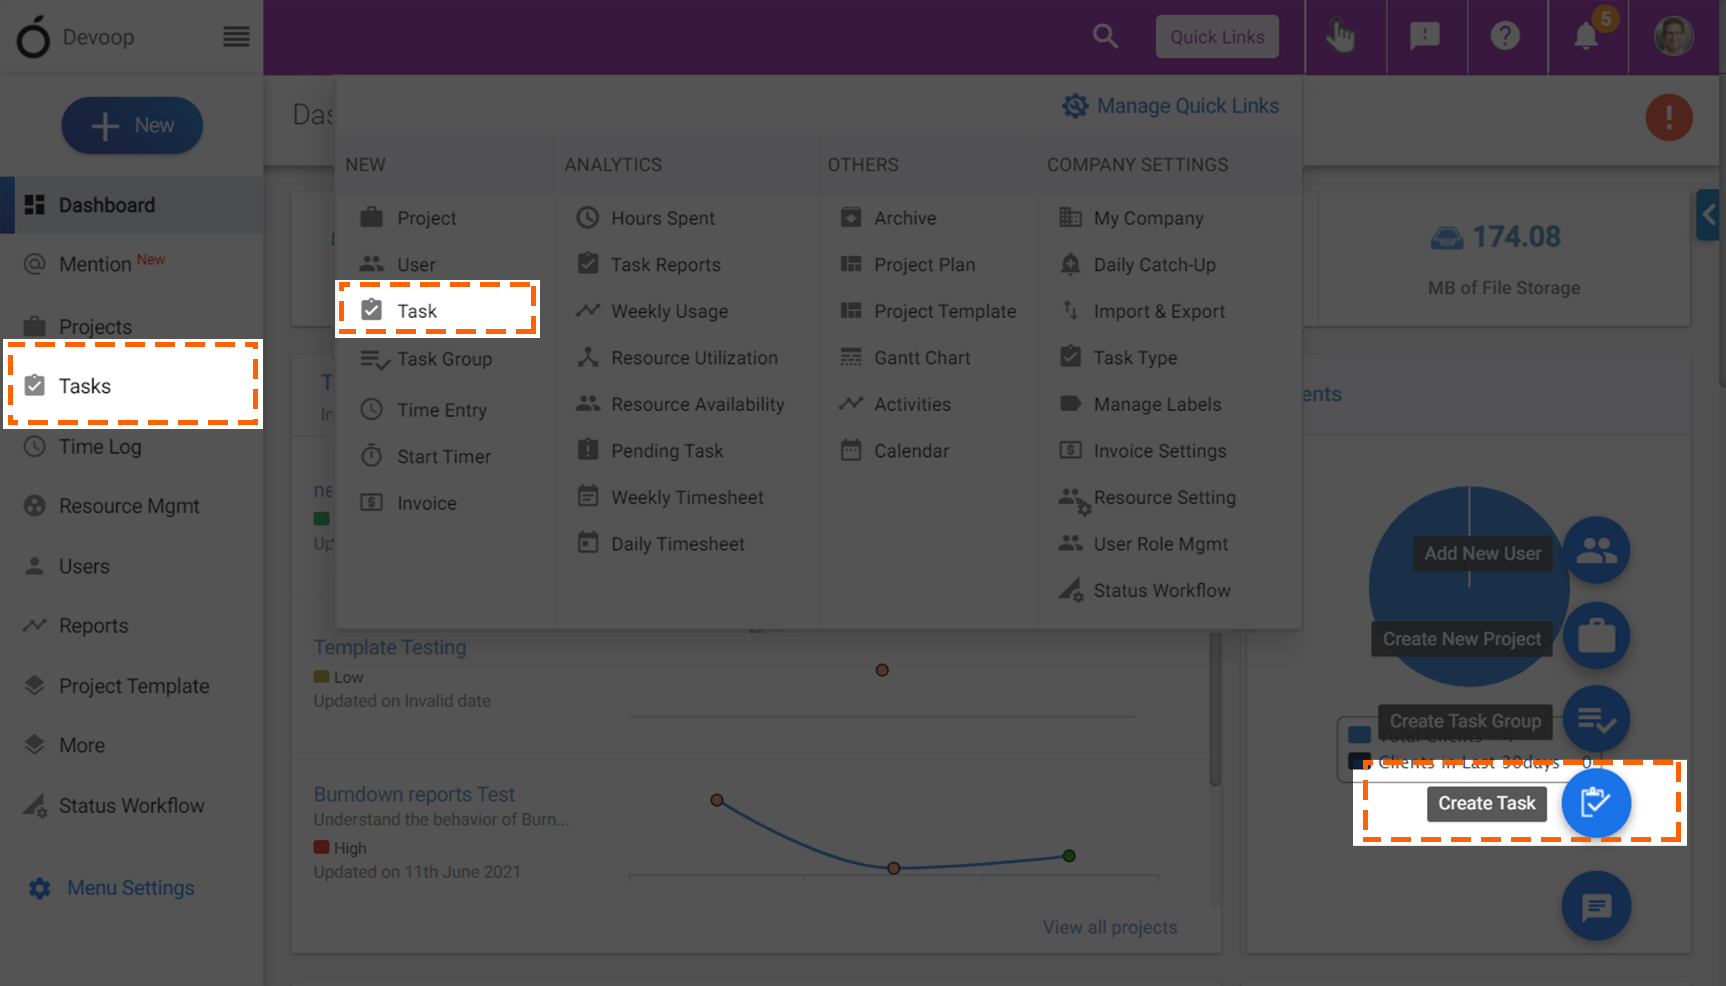
Now as you have created a project and added users, it’s time to create tasks. Go to “+Quick link” Menu present on the top right-hand side of the screen and click on “Task” submenu to create a new task. You can also create the task in two different ways as shown in the image below.
On the create Task page, enter task title, assign task, define task type and task group, start & end date and time and click on Save to create the task as shown in the image.

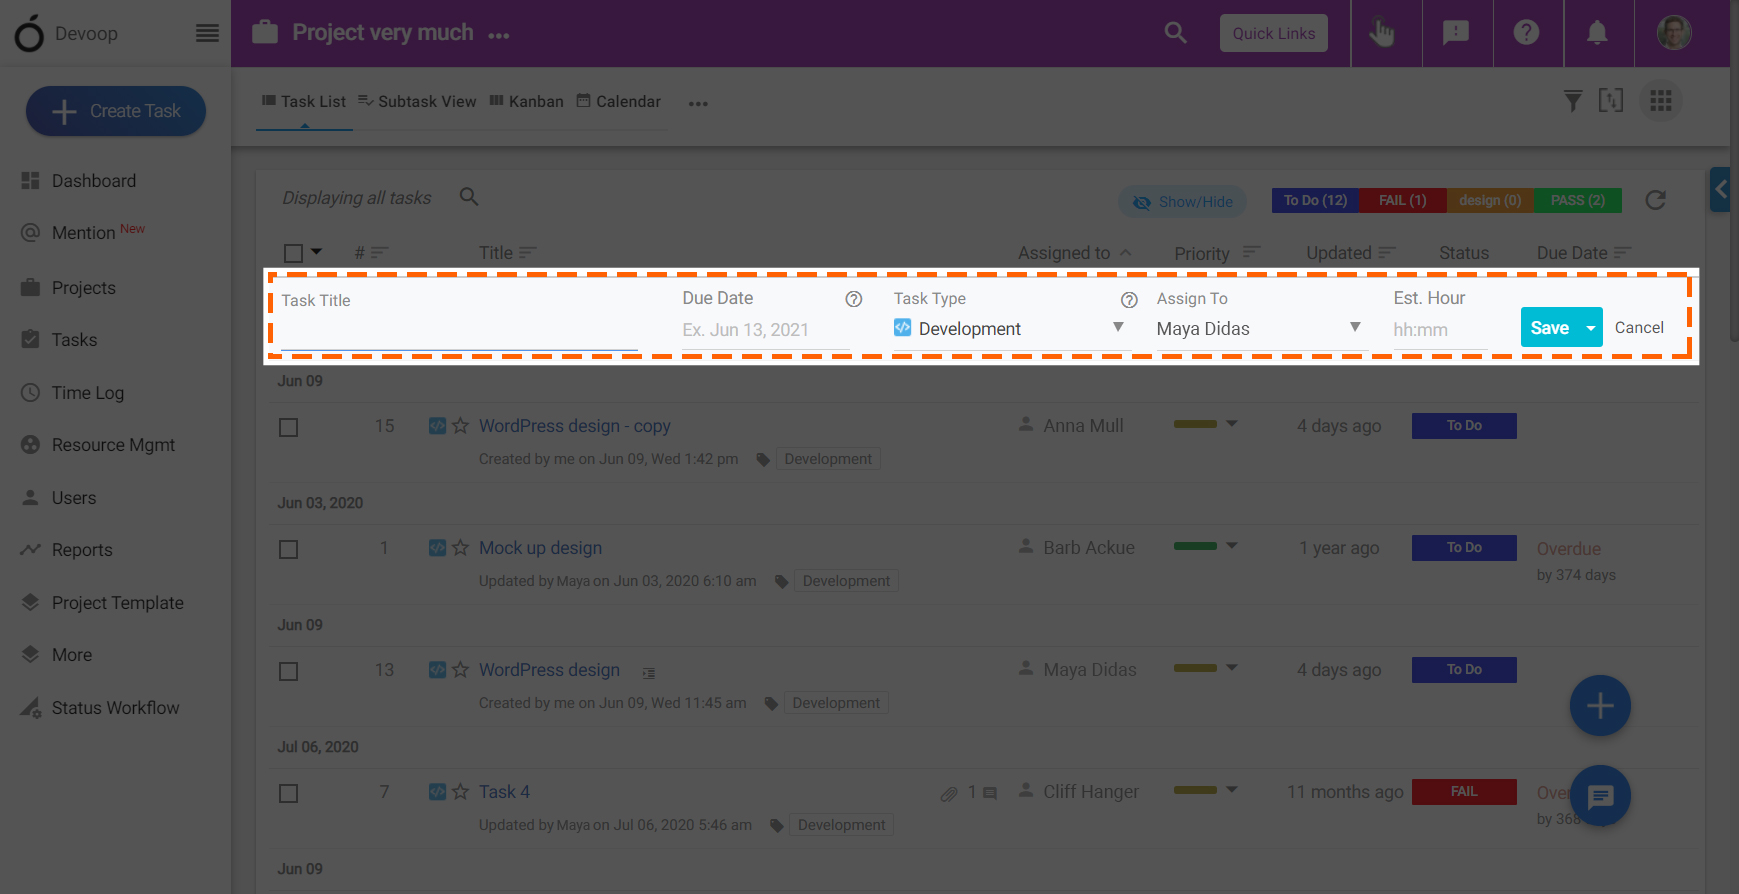
You can create a task from the task list using Quick Task feature as well. Click on +Quick Task to enter task title, define task type and assign task with an estimated hour and click on Save to create the task.
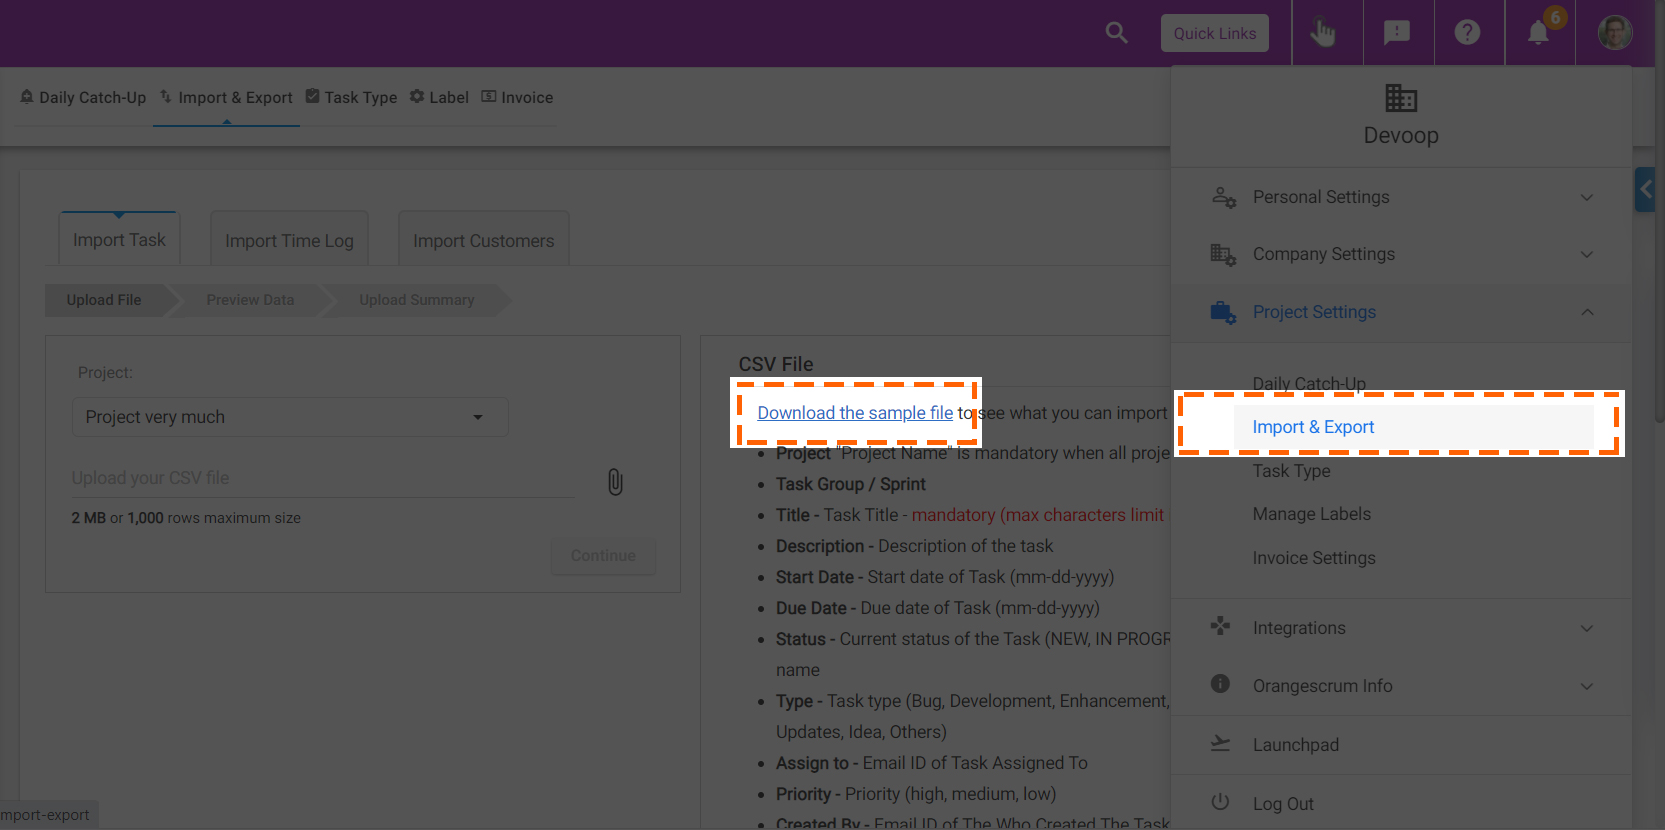
If you want to import tasks from any existing tool, it’s just a few clicks away. Click on “Account setting” and in the drop-down window, click on “Import & Export” sub-menu present under Company Settings. Now click on “Download .csv file” option to download a sample file. Insert your task in the prescribed format. This helps us to arrange the data and make sure you don’t lose any of the information.
Once you have arranged your data in the prescribed format, click on “Choose File” to upload the .csv file. Now click “Continue” and all your tasks are added in OrangeScrum.
You may export your created/uploaded task by clicking the export button in the right of the screen.
Task Group:
If you want to Group similar tasks, or milestone or department wise task or sub projects, then create a Task Group from Quick Links, Menu, Dashboard.
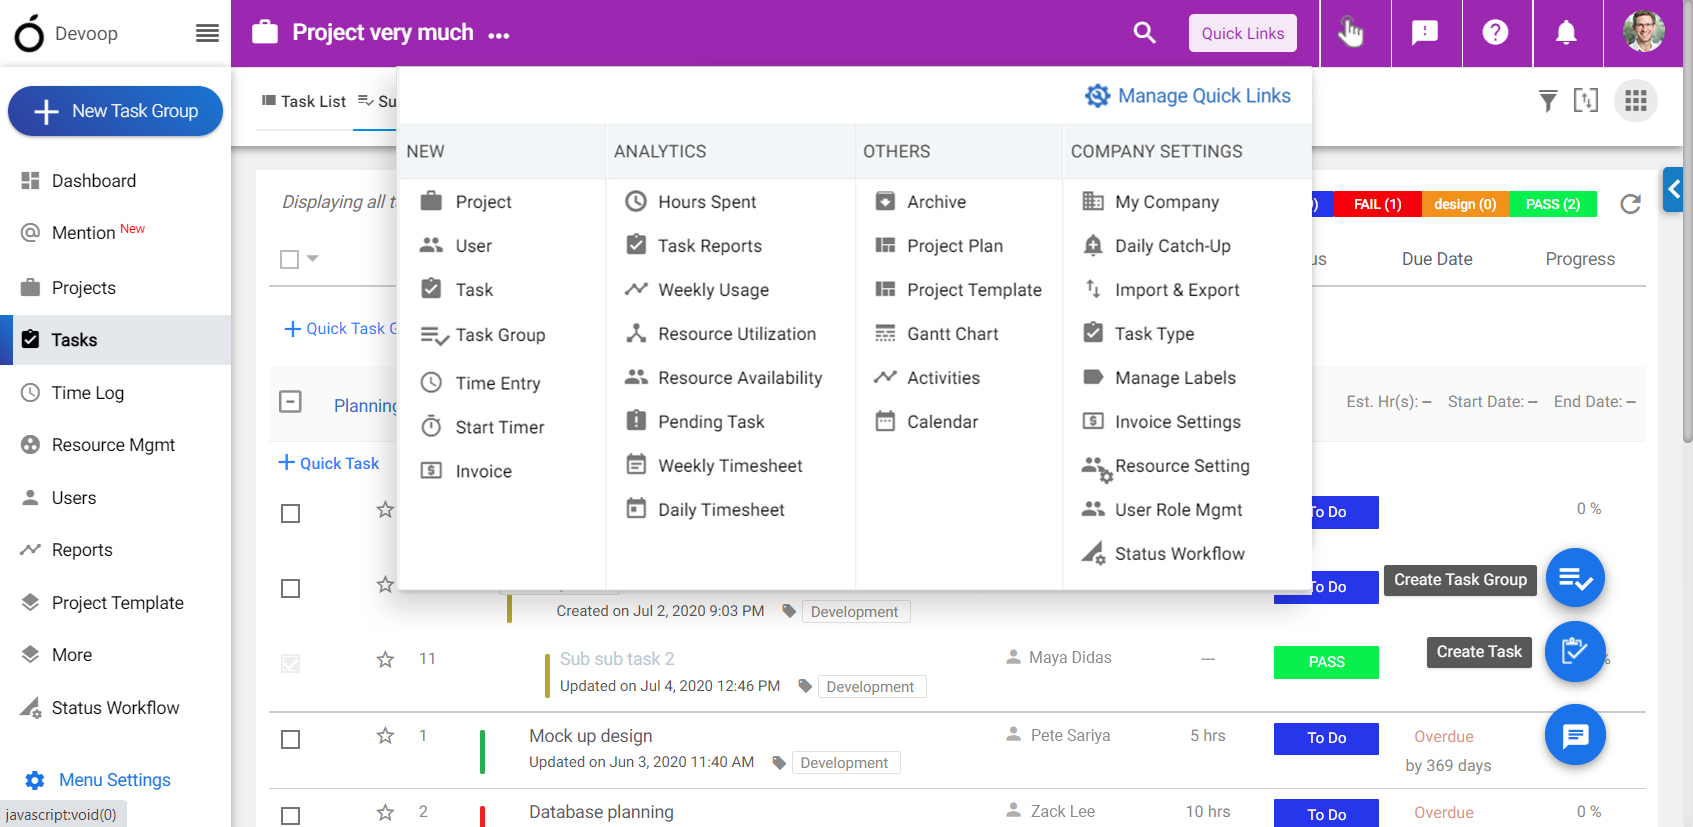
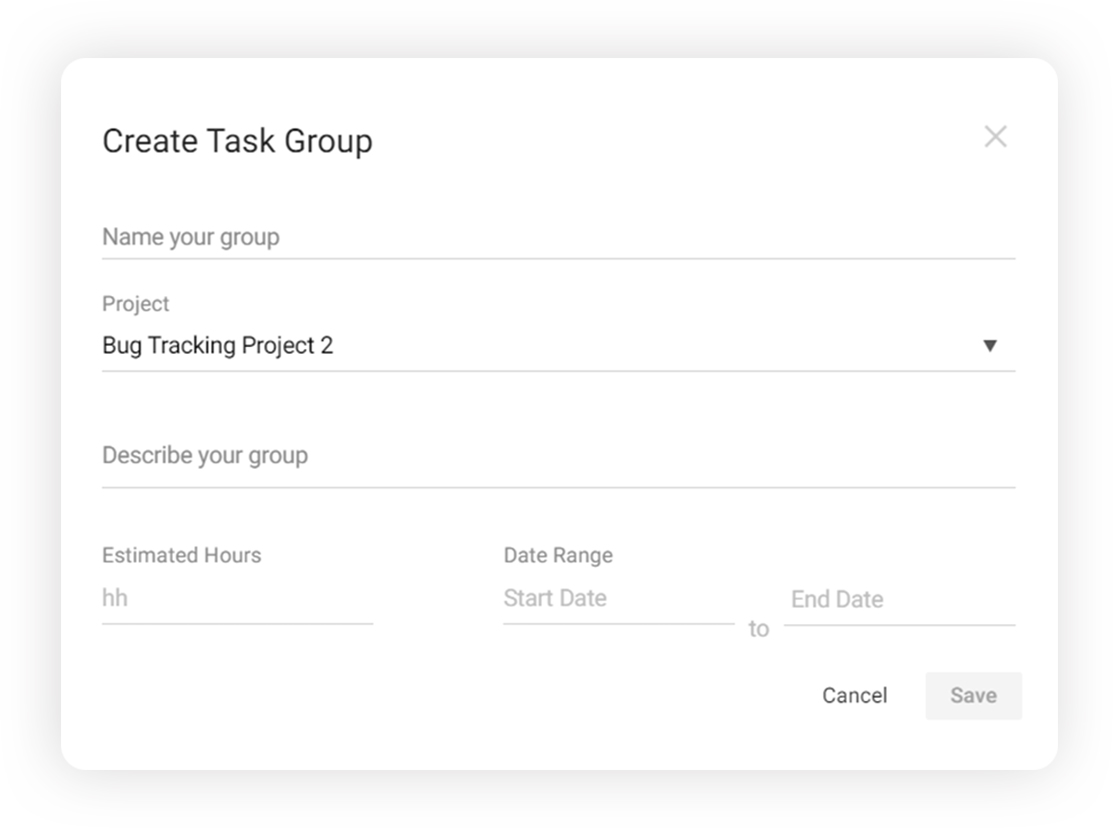
You can monitor your Task Group by creating with a Start Date and End Date as shown in image.
Create Custom Task Type:
Now that you have projects and tasks created and assigned, how will you track multiple tasks? Don’t worry, we have the fix ready. Now you can define the tasks based on any specific Task Type. And yes, you can custom define your own task groups. You can add custom task types or choose from default available task types listed on task type customization page. To add new task type, click on “New Task Type” button. This will open up a form to add custom task type.

Time Zone and Profile:
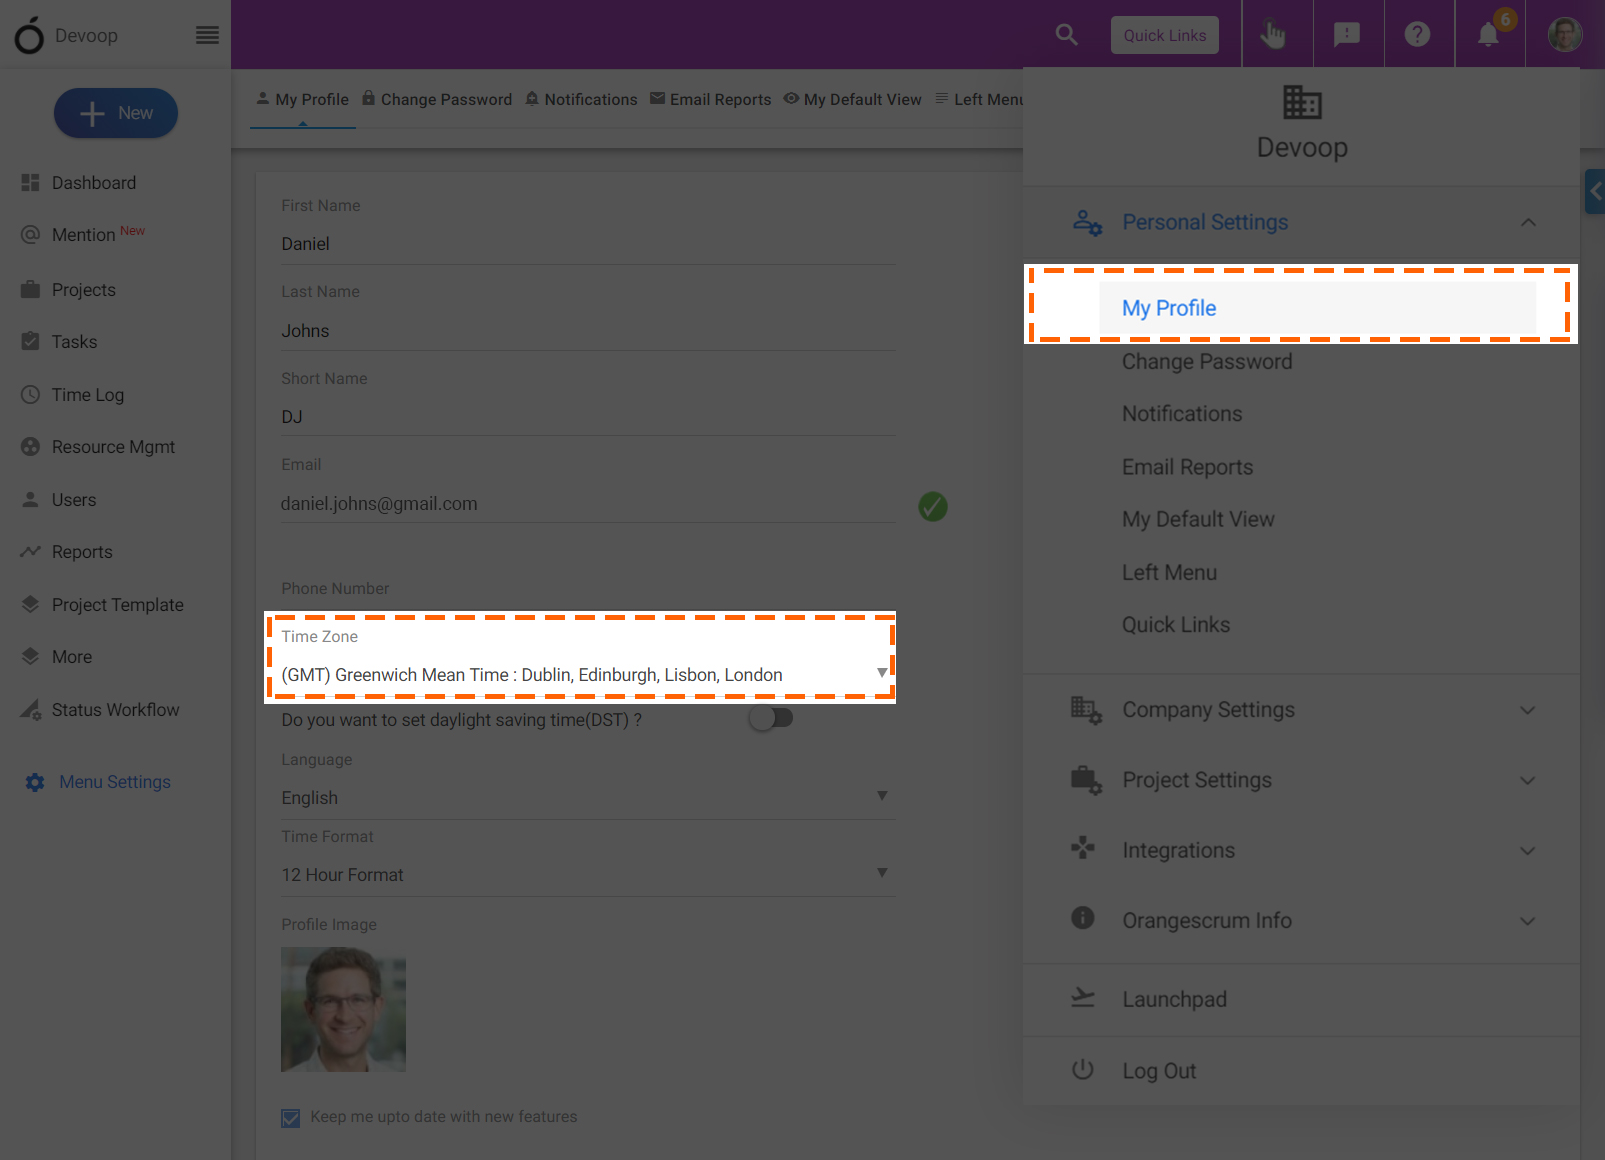
Click on your Profile button at the top-right corner of the page. click My Profile to change your name, time zone and profile photo.
Note: New time zone will only be effective in your OrangeScrum account once you log out and log in again.
Daily Catch-Up:
Daily reminding team members for updates is very noisy. It’s kills your time and gradually leads you towards micro-management. Well, you got a solution for this. Daily Catch-up feature automatically collects daily updates and allows you to review entire teams progress at one place.
In the Daily Catch-up Alerts settings page, select the Project from the project drop down to get all settings for daily Catch-up alerts.
- Select the user(s) by checking the check box(s) to send them Daily catch-up alerts.
- Select the Alert time from the drop down options to set a time for the Daily catch-up alerts.
- Select your Time zone from drop down List.
- Select the frequency to send the Daily catch-up alerts for particular days in a week.

Email Reports:
- Under “Personal Settings”, click on “Email Reports”.
- Enable/disable “Weekly Usage”, Task Status”, “Task Due” reports.

Kanban
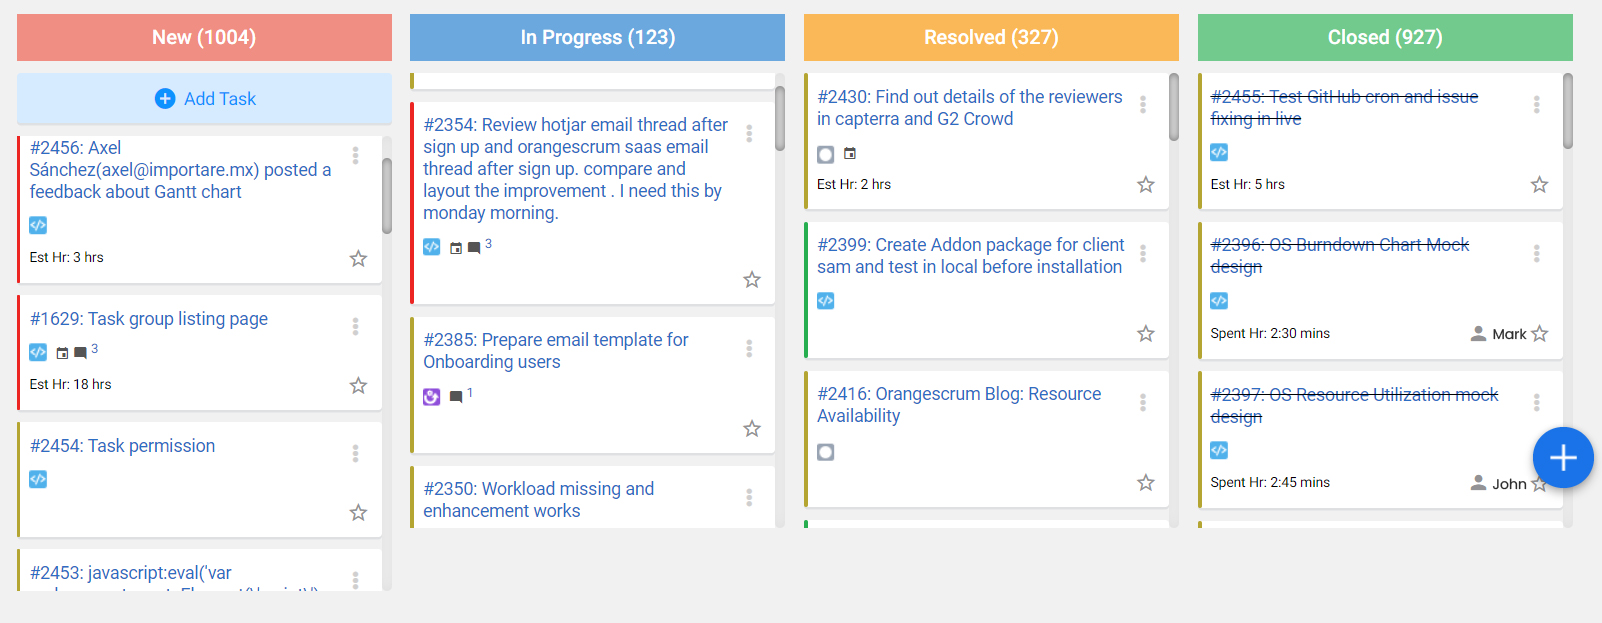
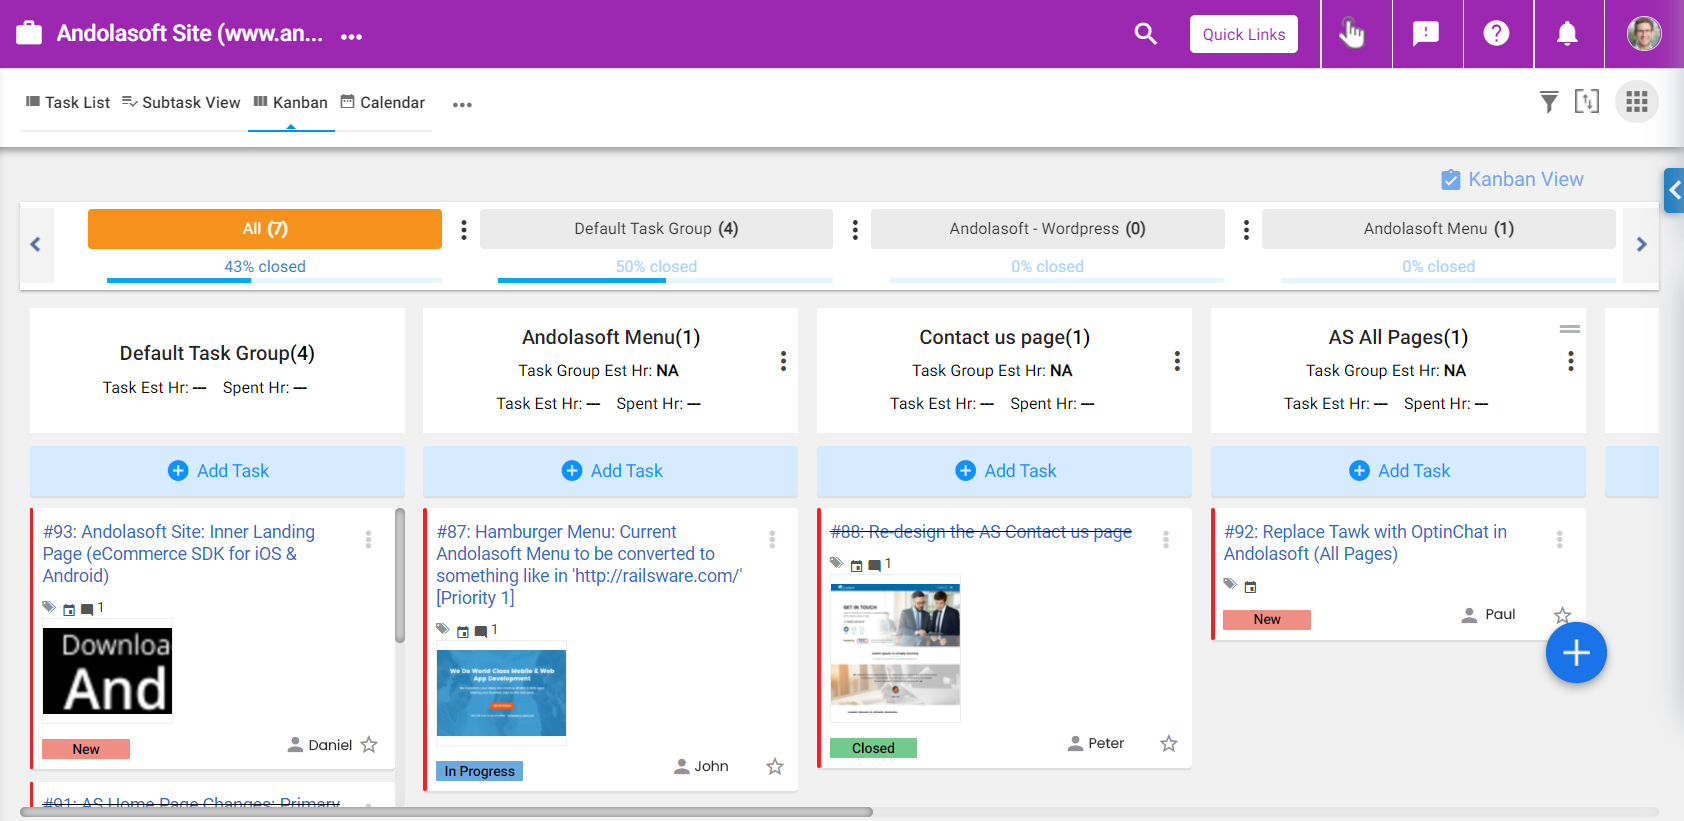
Do you want to check who is doing what on a single board? You can check the Scrum board in Kanban with Task Status “New, In Progress, Resolved and Closed”. You can view the Kanban view of Task group as well.
