How to Make Zoom Integration with Orangescrum
Orangescrum has come up with another big update and this time in the form of Zoom Integration. Now intra- and inter-team communication within the tool are far more easy and convenient. Now Orangescrum allows the users to set up meetings directly from within the tool.
How to initiate Zoom Connect:
To Integrate Zoom underneath a Company, the Account Owner or Admin needs to enable the Zoom integration feature for their users first.
To enable the Zoom Integration feature:
1: Go to “Profile” from the top right corner. (For Admin/Account Owner Only)
2: Click on “Integrations” (Refer to Image 1)
3: Select “Zoom” from the drop-down menu. (Refer to Image 1)
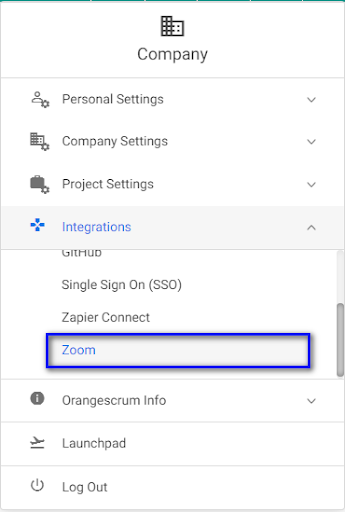
Image 1
** The user will be redirected to the Zoom Integration page.
4: Click on “Enable Zoom”
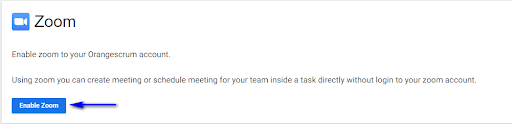
Image 2
Note: In case the Account Owner or Admin wants to disable the Zoom Integration feature, simply follow the same step and click on the “Disable” button. ( Refer to Image 3)
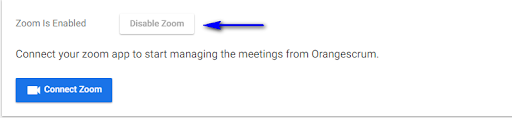
Image 3
How to Connect with Zoom:
After the feature gets enabled by the Account Owner / Admin, the user can able to find the “Connect Zoom” button at the Zoom integration page underneath their profile setting.
Click on the “Connect Zoom”. ( Refer to Image 4)

Image 4
You will be redirected to the Zoom Login pop-up.
You can either log in to your existing Zoom account or create a new Account on Zoom.
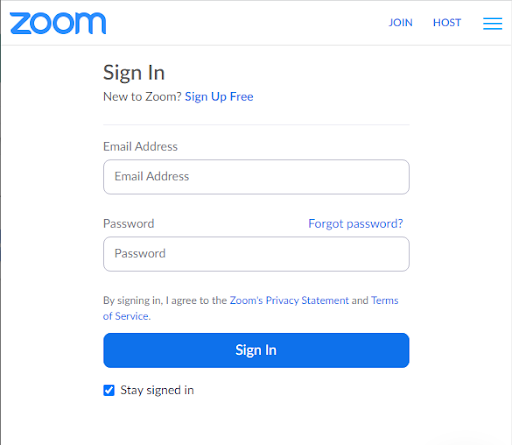
Image 5
**After signing in to Zoom, you will be asked to allow authorization between the Orangescrum account and the Zoom account.
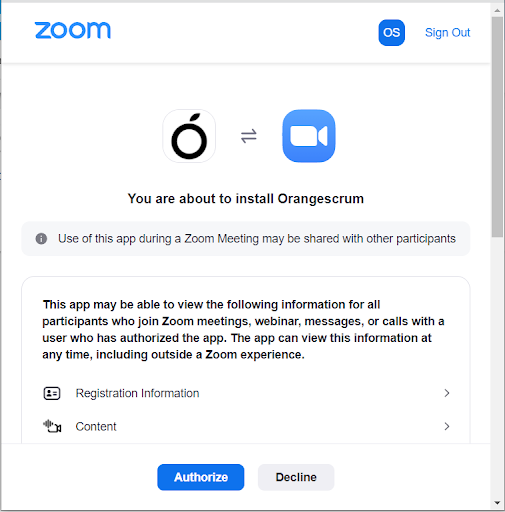
Image 6
**On click in “Authorize”, the integration between Orangescrum and Zoom will proceed.
User Note
- The Zoom can be enabled and authenticated only by the Owner or Admins for the company.
- Once the Zoom connection is authenticated by the Owner/Admin, the users can now easily set up new Zoom meetings or add existing Zoom meetings against a particular task.
- The Zoom connection can be done by users from the task detail page also. However, if it is being done from the Zoom Integration page, that has to be done by the Owner or Admins of the company.
How to create a new Zoom meeting:
The users with access to manage tasks can create a new Zoom meeting by following the tasks below.
1: Select “Tasks” from the left side menu.
2: Select the task for which you want to create a Zoom meeting.
3: Click on the “Zoom” option from the right side menu on the task details page.
** The user will be getting a dropdown menu with 2 options (Refer to Image 7)
- Create a new meeting
- Add an existing meeting
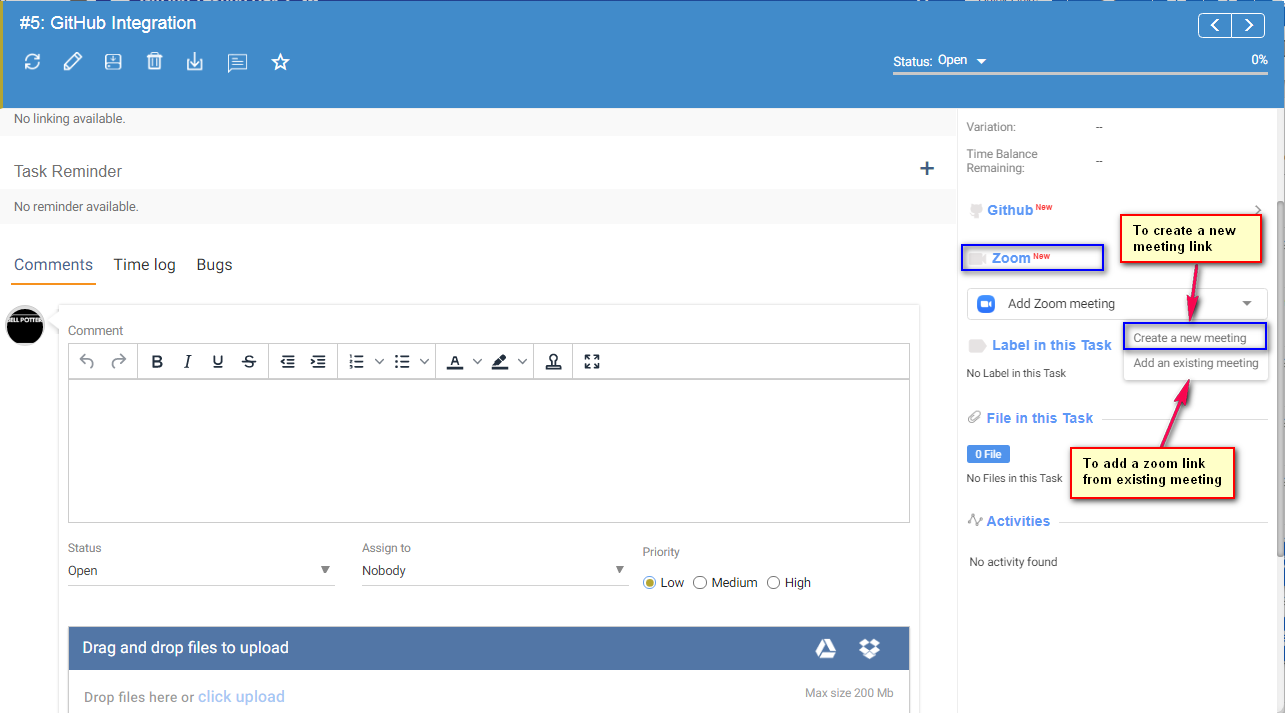
Image 7
4: Select the “Create a new meeting” option from the drop-down. (Refer to Image 7)
** The user will be asked to enter the meeting details.
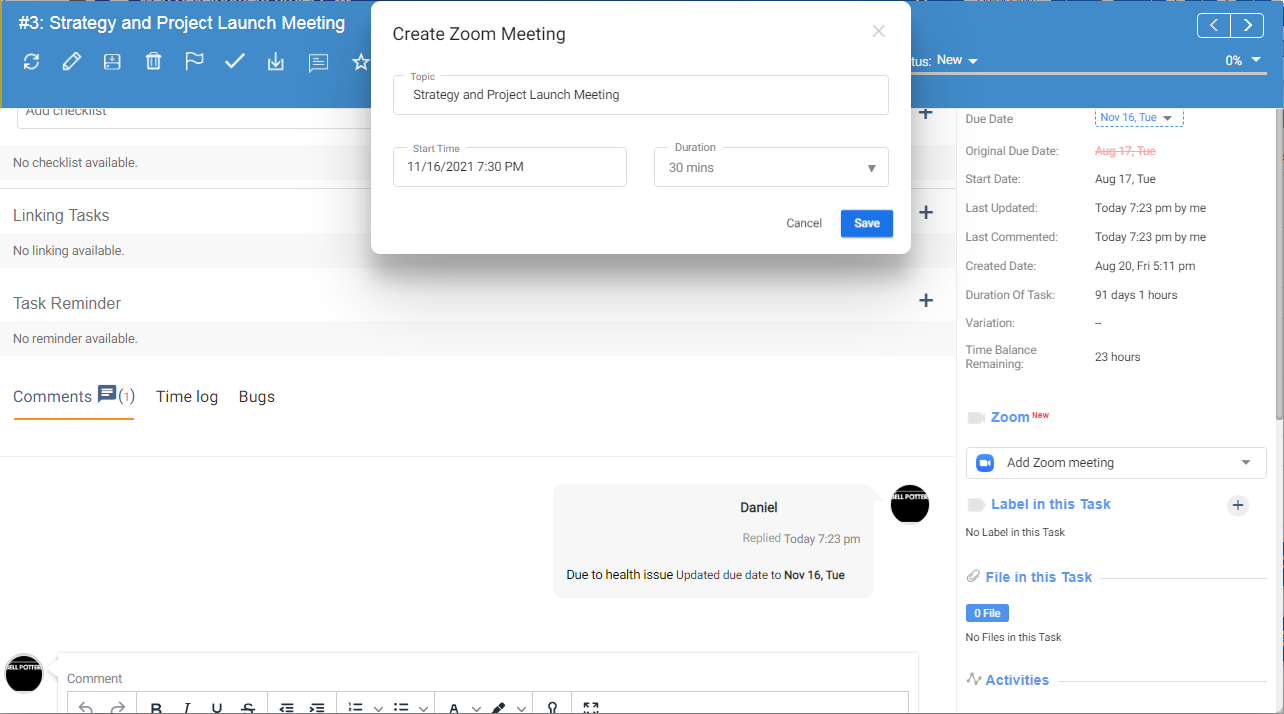
Image 8
5: Fill in the meeting details (Refer to Image 8)
6: Click on “Save” to create the Zoom. (Refer to Image 8)
* Orange Note
- Once the Zoom meeting is created, the user will be able to get the meeting details from the right side menu of the task details page.
- The users can create only one Zoom meeting per task currently. Separate Zoom meetings, however, can be created for the subtasks created within a task.
- The name of the Zoom meeting remains the same as that of the task/subtask against which the meeting has been created.
- All the users assigned to the tasks will be getting an email notification if the “Notify via email” option is enabled. The email carries the Zoom meeting I’d.
How to add an existing Zoom to the task:
The users can add an existing Zoom meeting to a task by following the steps below.
1: Select “Tasks” from the left side menu.
2: Select the task for which you want to add a Zoom meeting.
3: Click on the “Zoom” option from the right side menu on the task details page.
** The user will be getting a dropdown menu with 2 options
- Create a new Zoom meeting
- Add an existing meeting
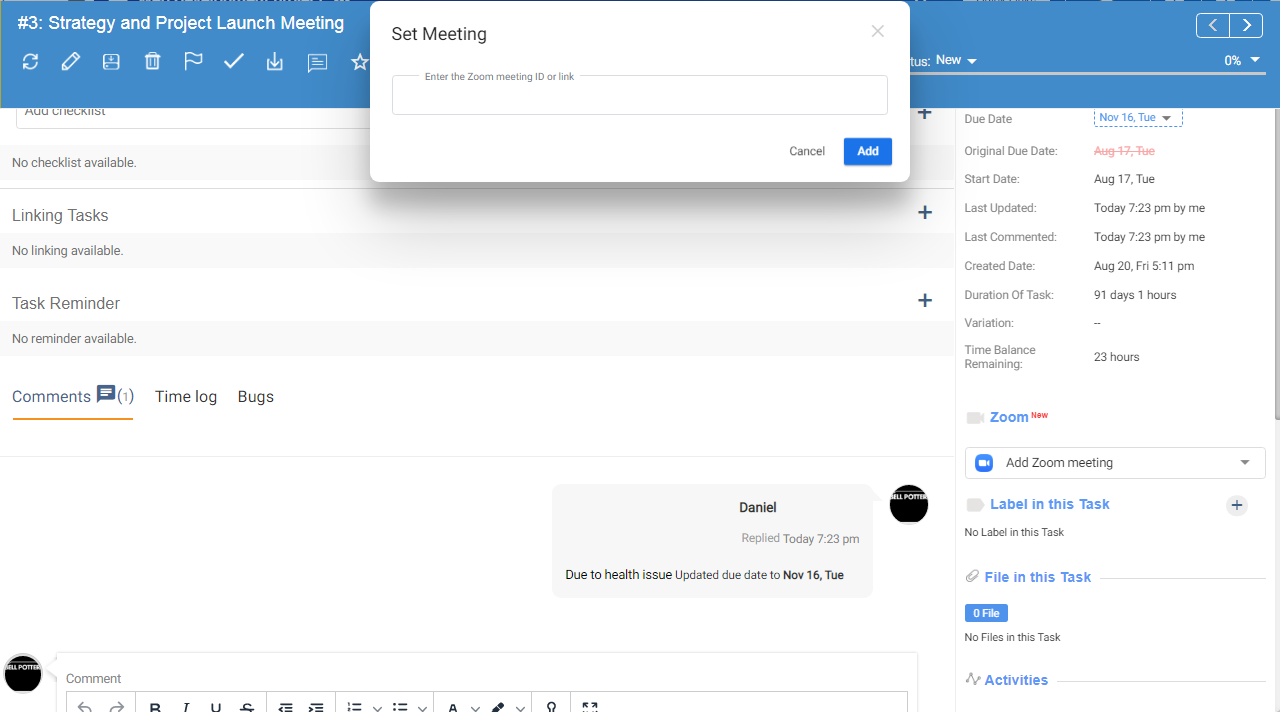
Image 9
4: Select the “Add Zoom” option from the drop-down. (Refer to Image 9)
5: Enter the Meeting I’d of the Zoom meeting you want to add to the task. ( Refer to Image 9)
User Note
- Once the Zoom meeting is added, the user will be able to get the meeting details from the right side menu of the task details page.
- The users can add only one Zoom meeting per task currently. Separate Zoom meetings, however, can be created for the subtasks created within a task.
- All the users assigned to the tasks will be getting an email notification if the “Notify via email” option is enabled. The email carries the Zoom meeting I’d.
How to view, copy, and Remove Zoom Meeting?
After creating a zoom meeting successfully, the associated users (to the task) can View, Copy Zoom Link, and Remove the meeting on the task details page. The users can view, copy and remove Zoom meetings by following the step below.
To view meeting details on Zoom:
1: Visit the “Task Details” page (Refer to Image 10)
2: Click on the “View in Zoom” (Refer to Image 10)
**Once users click on the “View in Zoom” the user will redirect to the zoom website/app with the created Zoom details.
To Copy Link:
1: Visit the “Task Details” page (Refer to Image 10)
2: Click on the “Copy Link” (Refer to Image 10)
**User is able to copy the Zoom meeting link after clicking on the “Copy Link”.
To Remove meeting from Task:
1: Visit the “Task Details” page (Refer to Image 10)
2: Click on the “Remove from Task” (Refer to Image 10)
Remove from Task: Users can remove the zoom meeting link, using the “Remove from task” button.
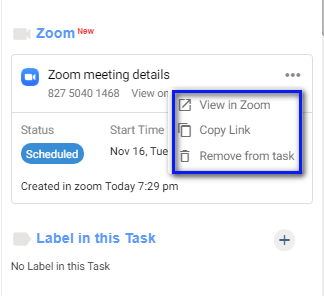
Image 10