Step 1
Download the source of Orangescrum community edition from https://www.orangescrum.org/free-download.
Extract the archive file.
Step 2
Required packages to install: Php 5.6, MySQL 5.6, Apache for Ubuntu
Requirement:
* Apache with `mod_rewrite`
* Enable curl in php.ini
* Change the ‘post_max_size’ and `upload_max_filesize` to 200Mb in php.ini
* PHP 5.6
Required PHP Extensions: –
php5.6-gd
php5.6-curl
php5.6-common
php5.6-fpm
php5.6-cli
php5.6-imap
php5.6-intl
php5.6-ldap
php5.6-mysql
php5.6-snmp
php5.6-tidy
php5.6-mcrypt
php5.6-mbstring
php5.6-soap
php5.6-zip
php5.6-dba
* MySQL 5.6
* If STRICT mode is On, turn it Off. Please follow below steps:-
- # vim /etc/mysql/conf.d/disable_strict_mode.cnf
and enter those two lines on it:=
[mysqld] sql_mode=IGNORE_SPACE,NO_ZERO_IN_DATE,NO_ZERO_DATE,ERROR_FOR_DIVISION_BY_ZERO,NO_AUTO_CREATE_USER,NO_ENGINE_SUBSTITUTION
- Then restart the mysql server:-
# sudo service mysql restart
* wkhtmltopdf installation Process
- sudo apt-get update
- sudo apt-get install wkhtmltopdf
- check version – wkhtmltopdf –V
- Define the path for wkhtmltopdf in Constants.php For Ex. Define(‘PDF_LIB_PATH’, ‘/usr/bin/wkhtmltopdf
Step 3
- Extract the archive file.
- Upload folder (orangescrum) to your working directory (/var/www/html).
- Provide proper write permission to ” app/tmp “, ” app/webroot ” and ” app/Config ” folders and their subfolders.
chmod -R 0777 app/Config
chmod -R 0777 app/tmp
chmod -R 0777 app/webroot
- You can change the write permission of “app/Config” after installation procedure is completed.
Step 4
sudo apt-get install mysql-server mysql-client
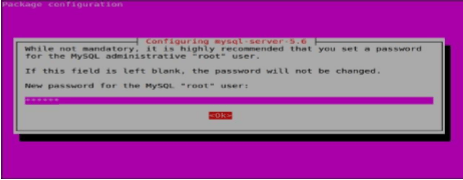
During installation, you’ll be asked to setup the MySQL “root” user password. Enter the password and click Ok.
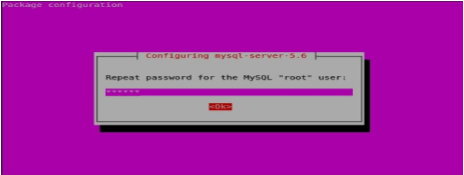
Re-enter the password.
You can verify the MySQL server status using command:
sudo systemctl status mysql
OR
sudo service mysql status
Step 5
Install phpMyAdmin(To access database Graphically)
phpMyAdmin is a free open-source web interface tool used to manage your MySQL databases. It is available in the Official Debian repositories. So install it with command:
sudo apt-get install phpmyadmin
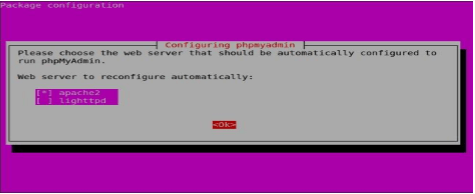
Select the Web server that should be automatically configured to run phpMyAdmin. In my case, it is apache2.
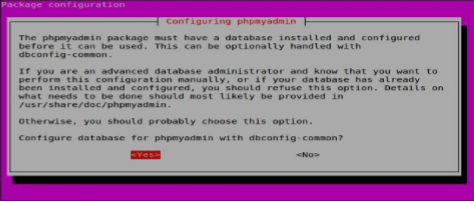
Select ‘Yes’ to configure database for phpmyadmin wjth dbconfig-common.
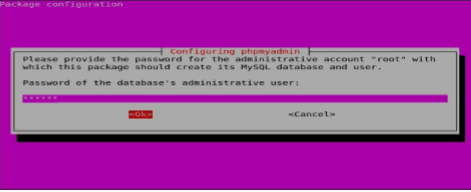
Enter password of the database’s administrative user:
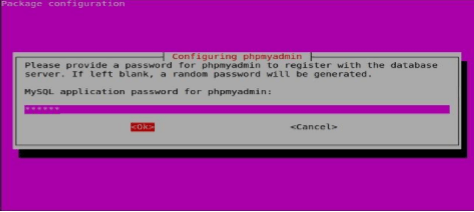
Enter MySQL application password for phpmyadmin:
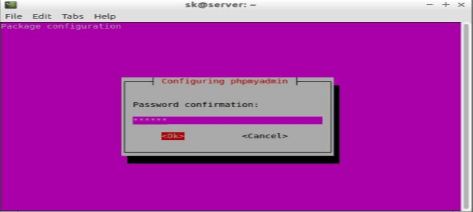
Re-enter password:
 Additional Note: if you followed all steps carefully, phpMyAdmin should work just fine. In case phpMyAdmin is not working, please do the following steps.
- Open terminal, and type:
sudo vim /etc/apache2/apache2.conf - Add the following line at the end.
Include /etc/phpmyadmin/apache.conf - Save and Exit and Restart apache service:
sudo systemctl restart apache2 or sudo service apache2 restart
Access phpMyAdmin Web Console
Now, you can access the phpmyadmin console by navigating to http://server-ipaddress/phpmyadmin/ from your browser.
Enter your MySQL username and password which you have given in previous steps.

Step 6
- Login To MySQL & Create Database named “orangescrum” .
- Login to mysql: [root@server ~]# mysql -u root -p
- Enter password:
- create the database: mysql> create database orangescrum;
- verify that it’s there: mysql> show databases;
- create the user: mysql> create user orangescrum;
- Grant all privileges while assigning the password: mysql> grant all on orangescrum.* to’orangescrum’@’localhost’ identified by ‘your_password’;
- Exit from the database: mysql> exit
- Import database sql file:
- Navigate folder name directory by typing : – cd /var/www/html/orangescrum [root@server ~]# mysql -u orangescrum(User Name) -p orangescrum(Database name) < database.sql(Database sql File)
- Enter password: Login to the database and check whether your tables are created or not: [root@server ~]# mysql -u orangescrum(User Name) -p
- Enter password: mysql> show databases;
- if your database exist then trigger the below command: mysql> use orangescrum(Database name); mysql> show tables; mysql> exit mysql> exit.
We have already updated the database name as “Orangescrum” which you can change at any point. In order to change it, just create a database using any name and update that name as database in DATABASE_CONFIG section. And also you can set a password for your Mysql login which you will have to update in the same page as password. [Required].
Step 7:-
- Install the Apache Server: sudo apt-get install apache2
- Enable and start your apache: systemctl enable apache2
- Start Apache Service: systemctl start/status/stop apache2
Step 8:-
Install PHP:
Install the PHP Packages: (Recommended Version php 56)
sudo apt-get install python-software-properties
sudo add-apt-repository ppa:ondrej/php
sudo apt-get update
sudo apt-cache search php 5.6
sudo apt-get install -y php5.6 php5.6-gd php5.6-curl php5.6-common php5.6-fpm php5.6-cli php5.6-gd php5.6- imap php5.6-intl php5.6-ldap php5.6-mysql php5.6-snmp php5.6-tidy php5.6-mcrypt php5.6-mbstring php5.6- soap php5.6-zip php5.6-dba
Check for php version:
php –v
Step 9:-
Setup the database information in app/config/database.php
Update the database connection details. (host, login, password and database name).
Step 10:-
Create a virtual host file
vim /etc/apache2/sites-available/os.conf
Add this below details to last line of os.conf file
<VirtualHost *:80> ServerName localhost # eg: demo.orangescrum.com
DocumentRoot /var/www/html/orangescrum/
<Directory /var/www/html/orangescrum/>
Options Indexes FollowSymLinks MultiViews
AllowOverride All
Order allow,deny allow from all </Directory>
</VirtualHost>
Save the file and Restart the Apache service
Systemctl restart apache2
OR
Service apache2 restart
Issue on Ubuntu with respect to htaccess:
Open this file and edit
vim /etc/apache2/apache2.conf Add this below file ( AllowOverride All instead of AllowOverride None) <Directory /var/www/html/> Options Indexes FollowSymLinks AllowOverride All Require all granted </Directory> Save the file and restart the Apache service.
Enable this module and restart the Apache service:
sudo a2enmod rewrite
sudo a2enmod headers
service apache2 restart
Step 10:-
General Configuration management:
MySQL:
If STRICT mode is On, turn it Off.:-
- Disable Strict mode on mysql for Ubuntu:-
To disable strict SQL mode:-
Create the below file
vim /etc/mysql/conf.d/disable_strict_mode.cnf
and enter those two lines on it: =
[mysqld]
sql_mode=IGNORE_SPACE,NO_ZERO_IN_DATE,NO_ZERO_DATE,ERROR_FOR_DIVISION_BYZE RO,NO_AUTO_CREATE_USER,NO_ENGINE_SUBSTITUTION
Then save the file and restart the mysql server:-
sudo service mysql restart
sudo systemctl restart mysql
PHP:
Enable curl in php.ini
Install the curl package to enable curl
sudo apt-get install php5-curl
And restart the apache server
sudo service apache2 restart
Change the ‘post_max_size’ and `upload_max_filesize` to 200Mb in php.ini
Open the php.ini file and change the ‘post_max_size’ and `upload_max_filesize` to 200Mb
Vim /etc/php.ini
Make sure that, the .htaccess is working in your server.
Step 11:-
Application Setup:
Provide your valid Gmail ID and Password for SMTP email sending Or, you can use Sendgrid or Mandrill.
FROM_EMAIL_NOTIFY All the task created/updated notification email will be sent from this Email ID.
SUPPORT_EMAIL All other Emails and support related Emails will be sent from this Email ID
SMTP SETUP
Provide your valid Gmail ID and Password for SMTP email sending Or, you can use Sendgrid or Mandrill in app/Config/Constants.php file.
FROM_EMAIL – this will be the default from email throughout Orangescrum.
FROM_EMAIL_EC All the task created/updated notification email will be sent from this Email ID.
SUPPORT_EMAIL All Other Emails and support related Emails will be sent from this Email ID.
Please follow below steps to configure your SMTP:
Step 1:
Go to the path in your application: app/Config/constants.php
Step 2:
Set the following in Gmail SMTP:
define(“SMTP_HOST”, “ssl://smtp.gmail.com”);
define(“SMTP_PORT”, “465”);
define(“SMTP_UNAME”, “youremail@gmail.com”);
define(“SMTP_PWORD”, “******”);
Please provide your smtp username and password to configure your SMTP.
If you are finding problem after setting the username and password, then please check the below:
Go to your php.ini file and enable the “php_openssl” in you PHP setting.
You need to enable extension=php_openssl.dll on php.ini file. If you are still facing the problem, then the port 465 is not available. Try with 587 port.
Otherwise, please contact with your server administrator.
Please run the following URL to check email is working or not:
http://YOURDOMAINNAME/cron/test_email/?to=emailId
Example:
http://localhost/orangescrum/cron/test_email/?to=emailId (if you are using localhost)
http://127.0.0.1/orangescrum/cron/test_email/?to=emailId (if you are using IP)
http://myprojects.orangescrum.com/cron/test_email/?to=emailId (if you are using any valid domain)
If the email is not working, then please follow the installation guide again.
Check Gmail security issues here. Please see below links, you have to change some configuration at email end.
https://support.google.com/accounts/answer/6010255?hl=en
https://www.google.com/settings/security/lesssecureapps
Also check app/tmp/logs/os-email.log file for any error.
Check SMTP Port:
If ports (465,587) are not enabled, then open it.
Still mail functionality is not working then try with changing the ports to (465,587, 25)
Add the hostname according to the mail server imap setting and Imap port. If ssl is enabled then add no validate-cert parameter to the hostname.
Then Add HOST Name, User Name & Password
To Use Own Email Server:
For own Email server: Add HOST_NAME, PORT, SMTP_UNAME, SMTP_PWORD in constant.php instead of gmail configuration.
Incorrect authentication data error:
Please double check the username and password.
If both are correct then check the server configuration. It’s somehow blocking the server to connect to the mail server. We cannot do anything to fix this.
Also make sure you’re not using 2 step verification and less secure app setting is ON.
FROM_EMAIL_EC All the task created/updated notification email will be sent from this Email ID.
SUPPORT_EMAIL All Other Emails and support related Emails will be sent from this Email ID.
Cron job setup:-
Email Reply – Nohup Cron Job setup (Linux Server)
Make sure to do the following changes on the Email server connection details in the app/webroot/EmailReply.php file.
$username- This will be the FROM_EMAIL_EC Email set on your app/Config/constants.php
All the task created/updated notification email will be sent from FROM_EMAIL_EC . When somebody will reply on that task created/updated notification email, the FROM_EMAIL_EC will get that Email in the inbox.
EmailReply.php page is going to read the emails from FROM_EMAIL_EC and It will post to them as a reply to the respective tasks in Orangescrum.
$password- Password of FROM_EMAIL_EC
client- Change it, if you are not using Gmail
After this setup, you can reply to a task created/updated notification email and that email reply will be posted to Orangescrum under that Task. This will help you to respond to a task while on the go from your Mobile.
(Assuming your Application is in “/var/www/html/orangescrum/ “)
Enable extension=php_imap in your php.ini file
Create a orangescrum.sh file in your server
vi orangescrum.sh (or, open that file to write the below code)
#!/bin/bash
while(true)
do
cd /var/www/html/orangescrum/app/webroot
php q EmailReply.php 1>&2
sleep 1?
done
Give the execute permission for orangescrum.sh: chmod +x orangescrum.sh
Start the Nohup using the command: nohup sh orangescrum.sh > customout.log &
Step 14
Browse the Orangescrum website http://YourIpAddress or server IP address or domain name. Ex. http://localhost/orangescrum or virtual host
Step 15
You will be asked to provide your Company Name, Email address and a Password to login and start using Orangescrum.


 (
( (
(