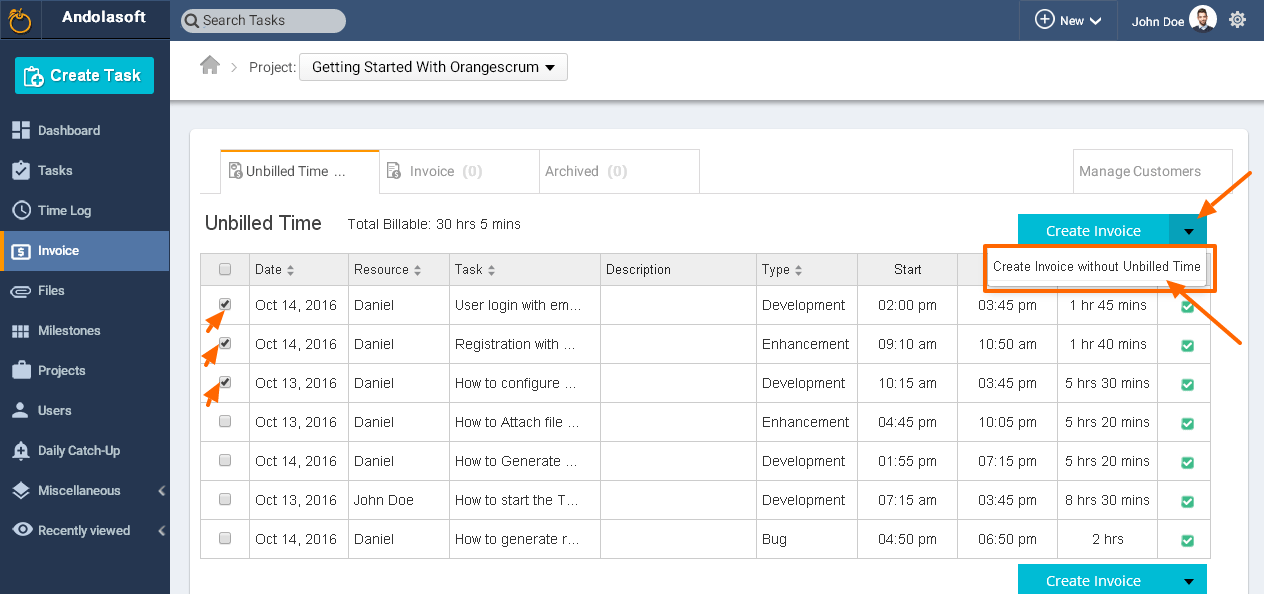
- Go to Invoice section by clicking this icon
 on left-hand side menu panel. It will display all unbilled time
 - Check one or more “Time log entries” and click on “Create Invoice” or button.

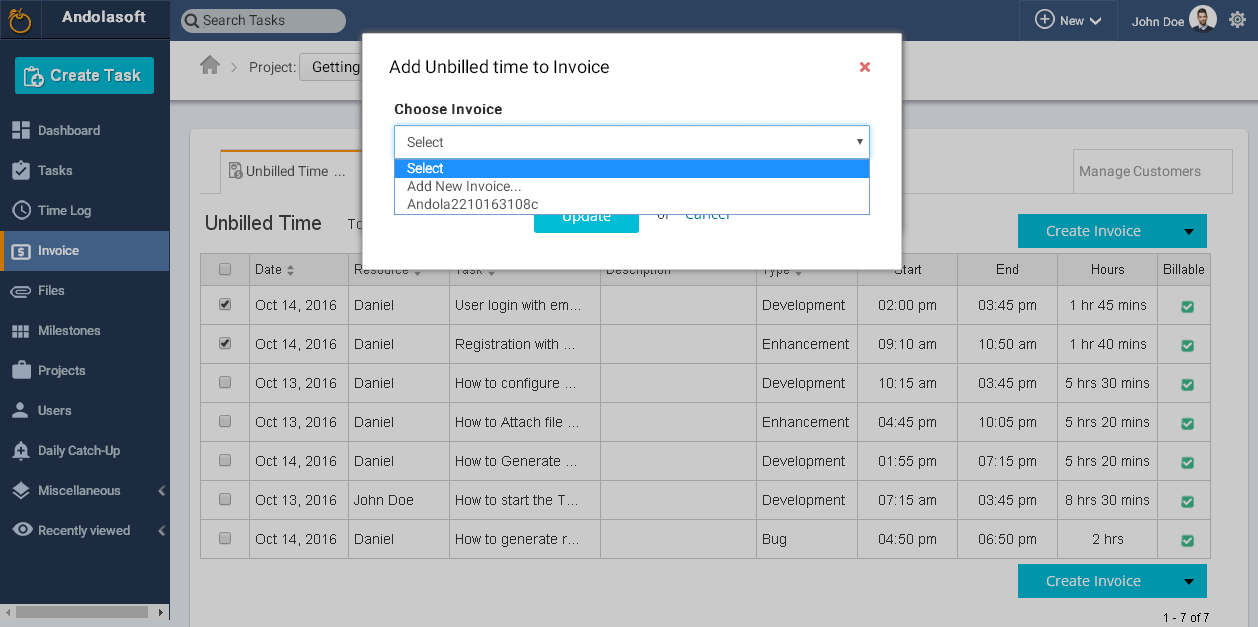
- It will pop up a window to select either to create a new invoice or add it to existing invoice. Then click on “Update” button.

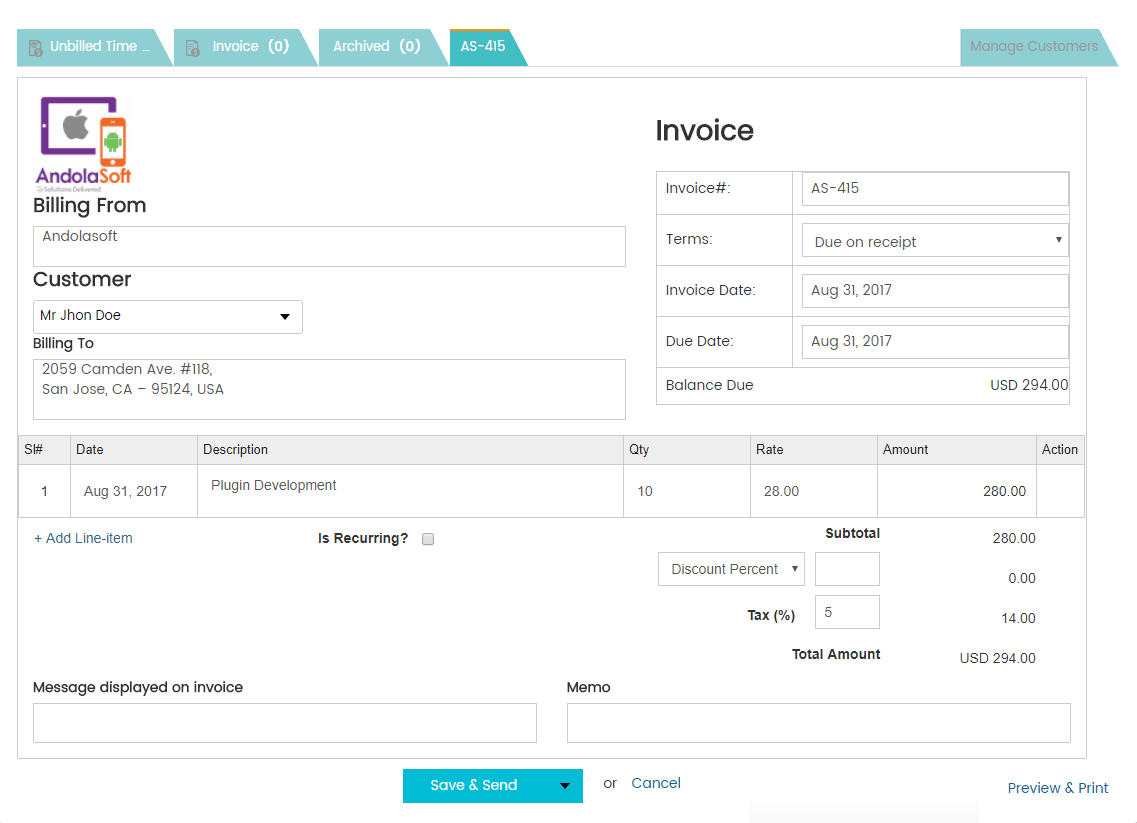
- It will redirect to create invoice page where you can enter invoice number. It should be alphanumeric. This field is mandatory. And also this number cannot be duplicated in one company.
- Then select one term from terms drop-down list. Terms are the number of days to pay the bill. According to the term selected, it changes the due date by which customer has to pay the bill. A user can also manually change the due date.
- Then pick an invoice date. It is the date for which invoice has been created.
- Then provide the billing from address. This is the address of the company who is creating the invoice.

- Then select one customer from the customers drop-down list. You can also add customer by selecting “+ Add New Customer”.

- Then provide the Billing To address which is the address of the customer.
- Then in line item pick a date for which date invoice is created.
- Provide the description.
- Then enter the quantity. Here quantity refers to the hour(s) spent on that particular item.
- Then enter rate, which is the unit price per hour.
- If you want to add more line item, you can do so by clicking on “+ Add Line-item” button.
- Then select the discount mode whether percent or flat and enter the discount amount.
- Then enter tax amount in percentage.
- You can also upload your company logo at the top left-hand side of the page. The logo must be smaller than 2MB in size. For the first time while creating an invoice, if company logo is present it will be shown otherwise it will display no image. While editing the image if there is no image for that company it will be stored as the company logo. Otherwise, it will be stored as that invoice logo.

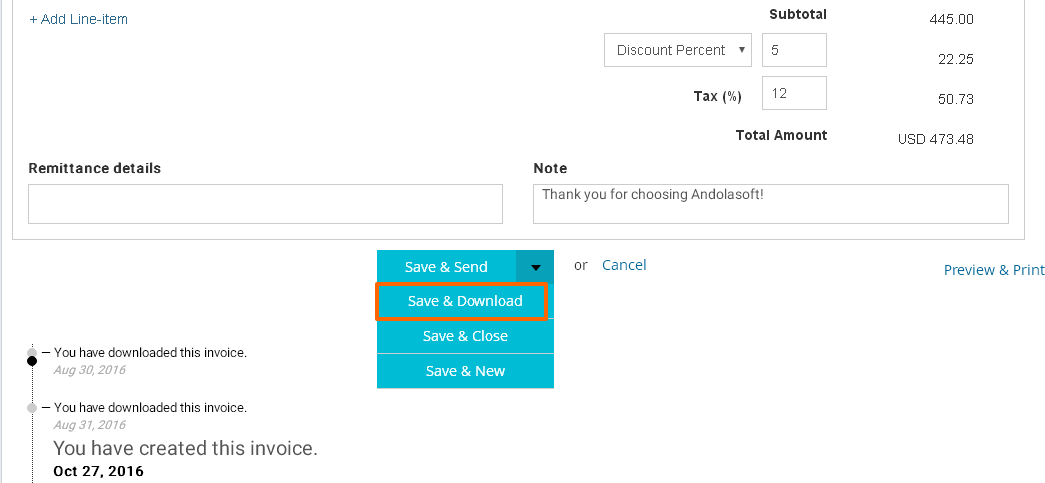
- Click on “Save & Send” button to save invoice and send email to the customer.
- Click on “Save & Download” button to save invoice and download it as pdf.
- Click on “Save and Close” button to save invoice and go to invoice list page.
- Click on “Save and New” button to save invoice and create another invoice.


 (
( (
(