Pre-Requisite:
Hardware:
- RAM: minimum 2 GB
- Processor: Core2duo or Higher
- OS: Mac
- Disk Space: 10 GB or Higher
Software:
- Apache 2.2 or 2.4
- MySql: 5.6
- PHP >= 5.4 and PHP <= 5.6 (best choice is 5.6)
- cURL (enabled)
- XAMPP for Mac
Step 1
First Download the Source Code
From the “www.orangescrum.org/free-download” Extract the archive file.
Step 2
Download the latest XAMPP for Mac
( https://www.apachefriends.org/download.html )
Step 3
Then install the XAMPP on MAC. Refer the steps provided below to setup XAMPP.
1.Open the DMG package and drag the XAMPP folder into your /Applications folder. All the XAMPP files are contained in the /Applications/XAMPP/xamppfiles folder with links to cgi-bin, htdocs and logs folders. Double click on the image to start the installation procedure.
 2. XAMPP is now installed below the /Application/XAMPP directory.
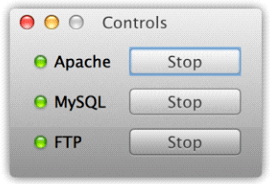
3. Start the Apache, MySQL and FTP servers by clicking on the button for each of these services in the XAMPP Control Panel. Each of the service lights should show green like this:
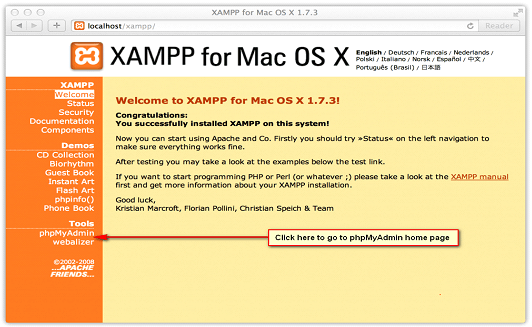
4.Open a browser and type http://localhost. You will redirect to XAMPP for Mac OS X startup screen:
5. XAMPP installation is finished.
Step 4
Now you have to create a Database named “orangescrum” using Phpmyadmin for the application. Refer the steps below to create a Database, user and assign all privileges to the user for the database.
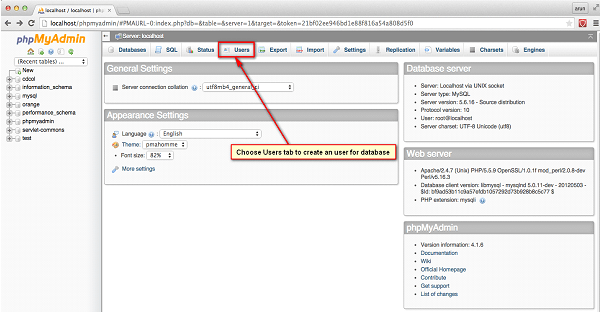
1.After navigating to PhpMyAdmin page, click on the “Users” Tab.
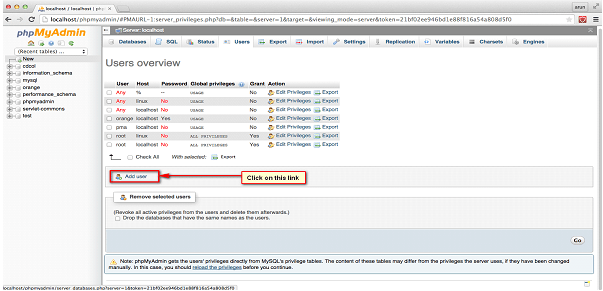
2. Next, Click on the “Add user” option.
3.Now, Enter the fields as shown in the below Image. Create a user, assign a password to it and create a database with the same name as user.

4.Click on Databases Tab to Navigate to the List of Databases page.
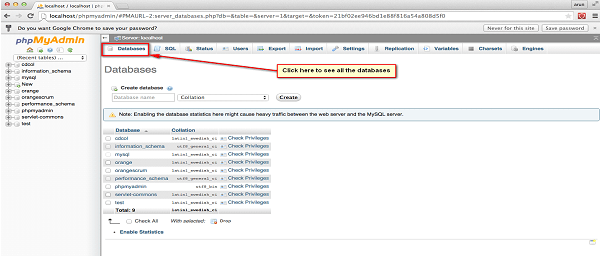 5. Click on the database “orangescrum” which you have created earlier.
6.After choosing the Database, click on the privileges tab to open the privileges settings as shown in the below images.
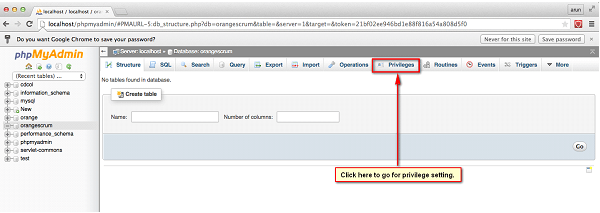
 7.Now grant all privileges (Administration) to the user for the database as shown in the below Images.
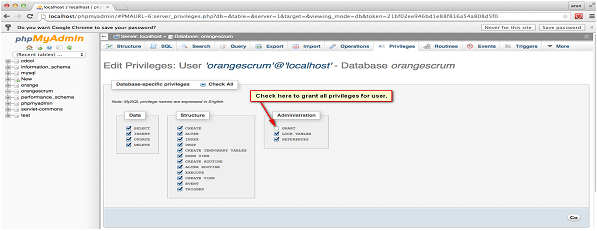
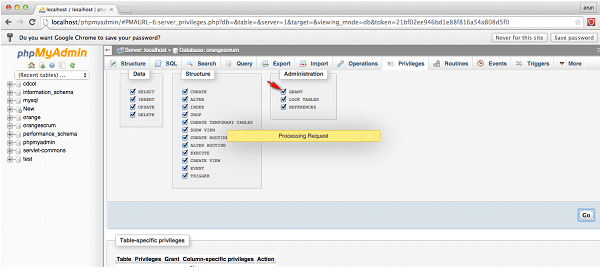
8.After Granting all privileges to the user, now import the database to the Mysql server.

9.Click on “Choose file” option to browse for the Database file from the source code(orangescrumPM) which you have downloaded earlier and click on “Go”.
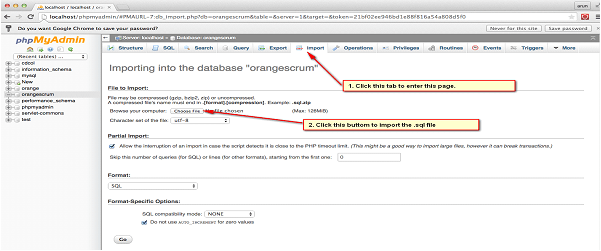 10.Now, you can see the Table Structure under the Database.
Step 5
Now, you have to configure the Application with the Apache web server.
Refer the below steps.
1.Navigate to the xampp folder where you have installed the XAMPP software or you may call the installation folder.
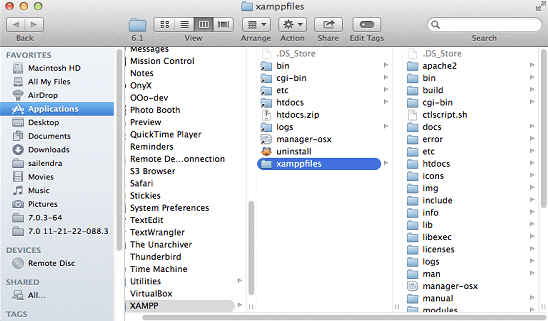
2.Paste the source code folder of Orangescrum(orangescrum-master) which you have downloaded earlier inside the “htdocs” folder as shown in the below image.

3.Now, navigate to the orangescrum-master\app\Config directory.
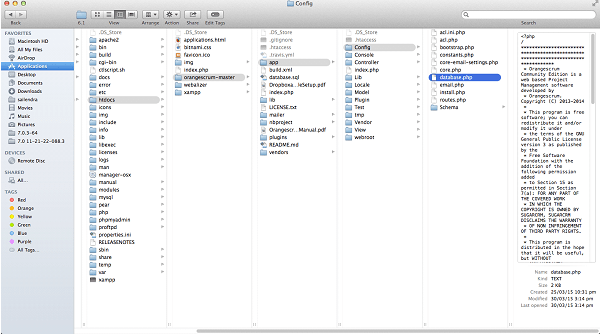 4.Open the database.php file in an editor and change the fields
‘host’ => ‘localhost’
‘login’ => ‘root’
‘password’ => ”
‘database’ => ”
To
‘host’ => ‘localhost’ ←———————– The host name should remain Localhost.
‘login’ => ‘orangescrum’ ←—————– Database username which you have created earlier
‘password’ => ‘*****’ ←——————–Enter the password which you have assigned to the user earlier
‘database’ => ‘orangescrum’ ←———————–Enter the Database name which you created earlier.
Step 6
General configuration management
MySQL:
- If STRICT mode is On, turn it Off.
- Goto phpmyadmin
- Look at the top and towards the right for variables. Click on that then either scroll down to sql mode or use the filter. Hover over the row that says sql mode and an edit button should appear.
- STRICT_TRANS_TABLES,NO_ENGINE_SUBSTITUTION
- Change to:NO_AUTO_CREATE_USER,NO_ENGINE_SUBSTITUTION
2.Create a new MySQL database named “orangescrum” (‘utf8_unicode_ci’ collation).
PHP:
- Enable curl in php.ini
- Change the ‘ post_max_size ‘ and ` upload_max_filesize ` to 200Mb in php.ini
- Make sure that, the .htaccess is working in your server.
Application Setup:
- Provide your valid Gmail ID and Password for SMTP email sending Or, you can use Sendgrid or Mandrill.
- FROM_EMAIL_NOTIFY All the task created/updated notification email will be sent from this Email ID.
- SUPPORT_EMAIL All other Emails and support related Emails will be sent from this Email ID.
Step 7
Now you are all set!!
Run Orangescrum as http://yourIPaddress/orangescrumPM/ from your browser. Change the “Configure::write(‘debug’,2)” to “Configure::write(‘debug’,0)” in app/Config/core.php.
There are situations when you might get into small glitch while starting up with Orangescrum. You will get the below output, if the SUB_FOLDER in the constants.php file is not set properly.
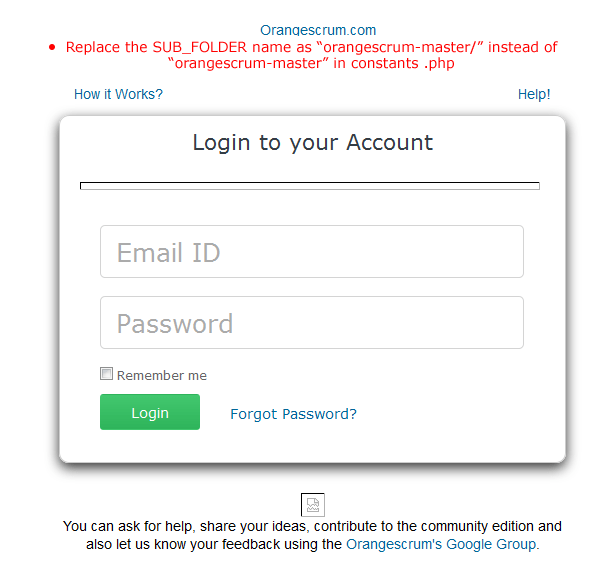
On such situations, please follow the quick fix as mentioned below;
Ex:- Let your sub folder is “orangescrum-master”. You set up SUB_FOLDER as define(‘SUB_FOLDER’, ‘orangescrum-master’); instead of define(‘SUB_FOLDER’, ‘orangescrum-master/’);
Step 8
You may check other configurations in app/Config/constants.php
https://www.orangescrum.org/general-installation-guide#oth_id


 (
( (
(