The Payment feature will help you to keep track of your payables along with your team’s time to ensure transparent management of contractors, freelancers, third Party Vendors, Technology Service Providers, distributors etc.
To create a payment for your extended team follow the below steps as mentioned:
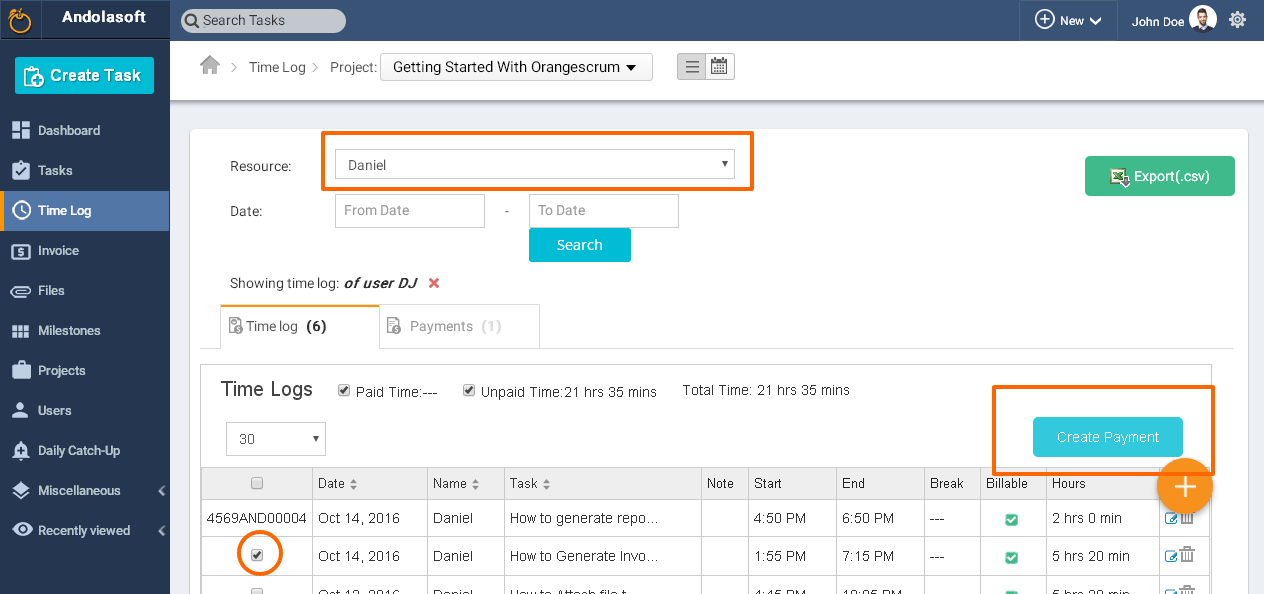
- Go to the Time Log Page
- Select one Resource
- Go to the Time Log sheet
- Mark the Time entries to create a Payment
- Click on the Create Payment
- You can see the Add Unbilled time to Payment pop up form.
- Select the option to create a new Payment or to continue with the existing Payment.
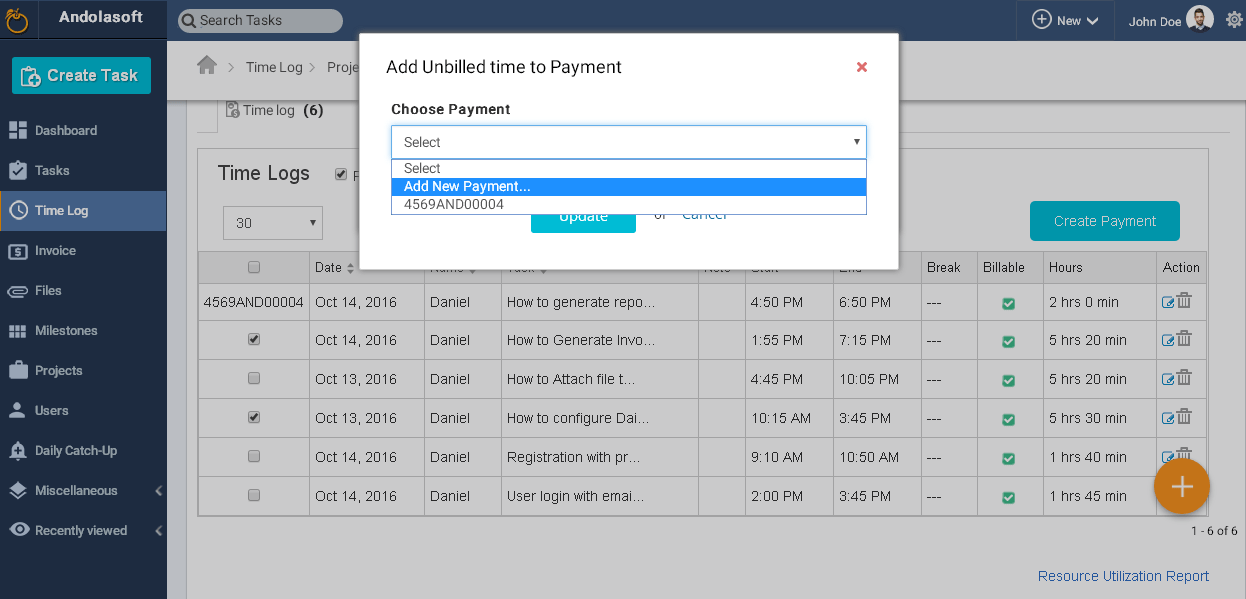
- Select New Payment, you will be redirected to Payment page
- On the Payment page, edit, select or enter the following data:
- Billing From
- Payee
- Payment #
- Hourly Rate
- Currency
- Payment Date
- Reduction Percentage or flat Rate
- Tax
- Remittance details
- Note

- You can edit the Task Date, Description, Billable Hours, Rate as well.
- If you select add Payment to the existing Payment, then the marked billable hours will be automatically updated to the Payment.
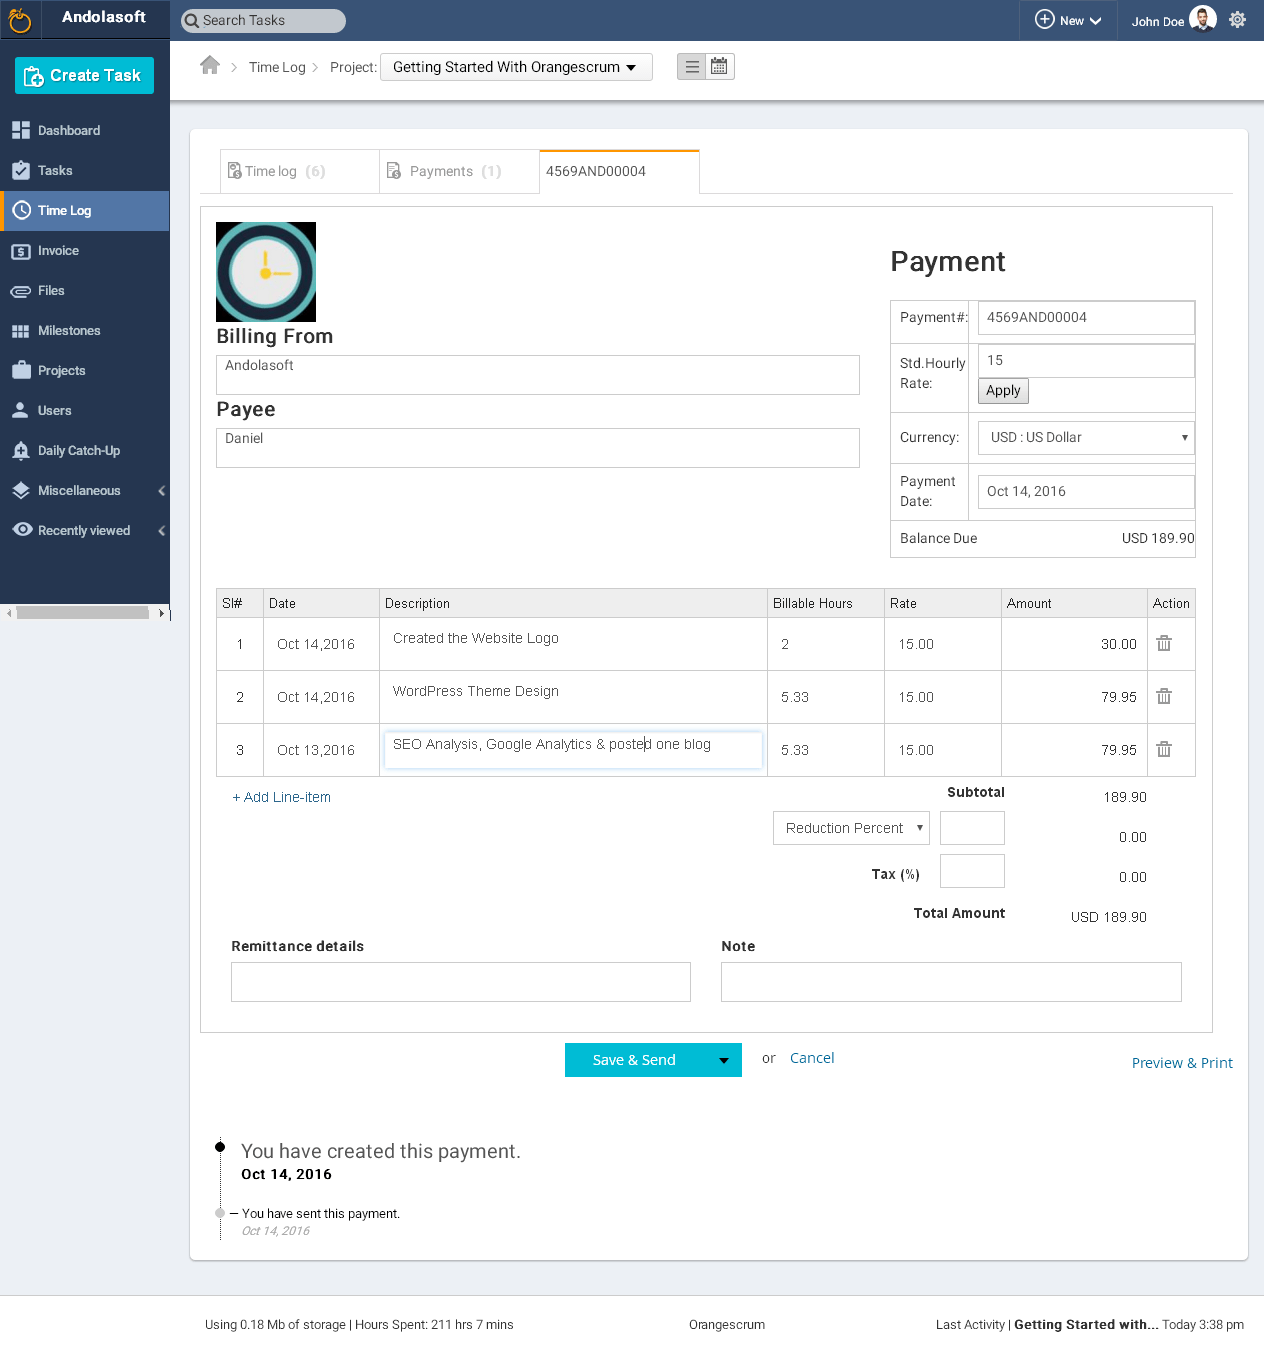
- You can Save, Send, Download, Print this Payment.
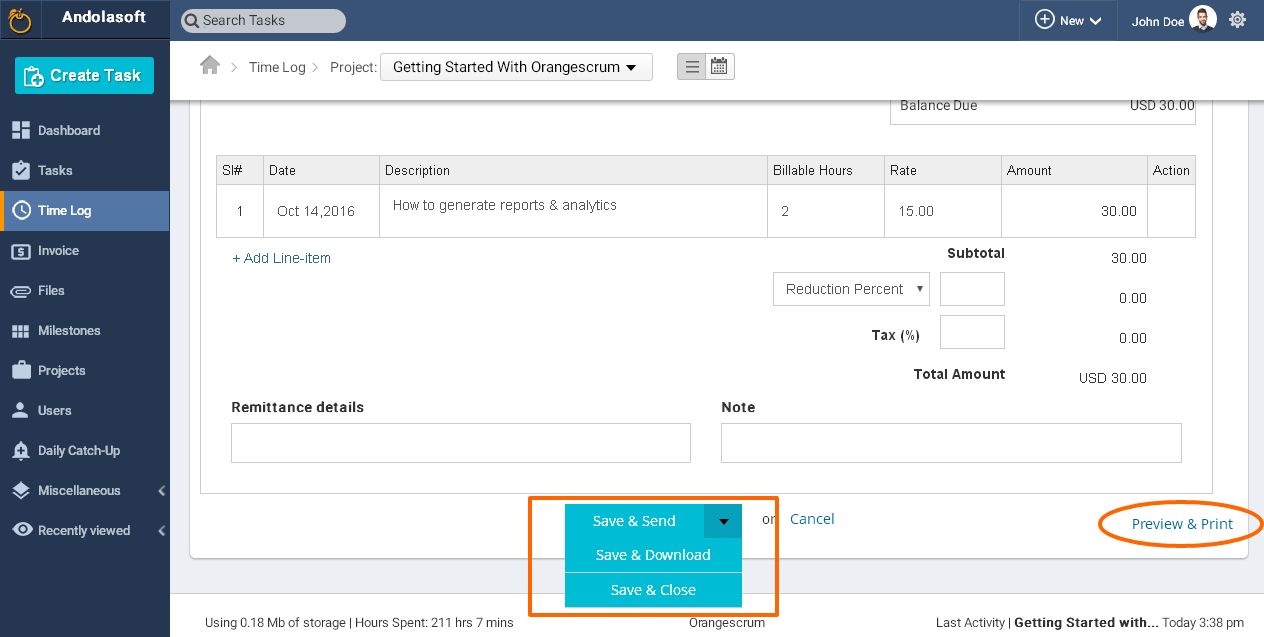
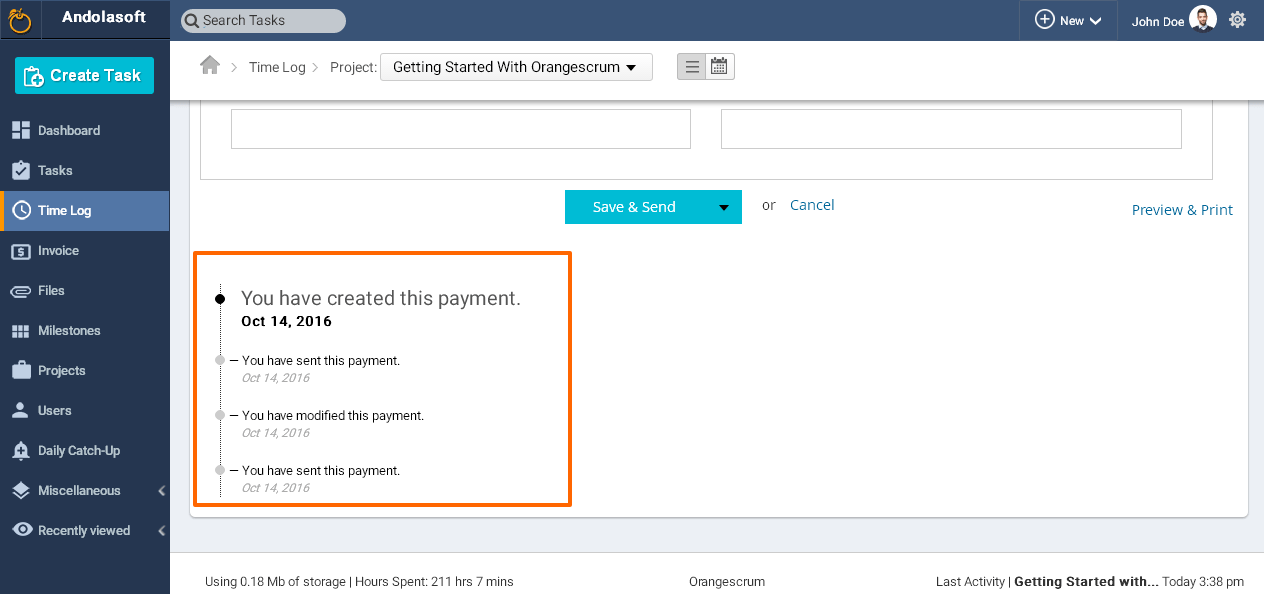
- You can see the update of the same Payment at the bottom of your Payment.
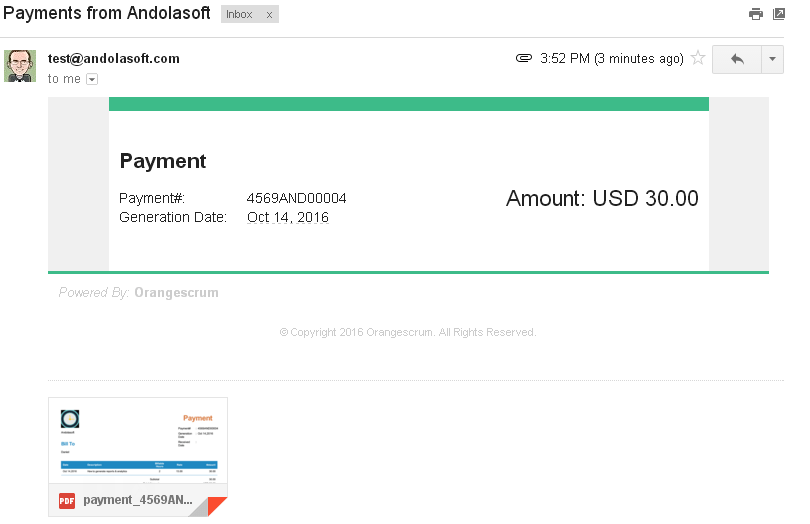
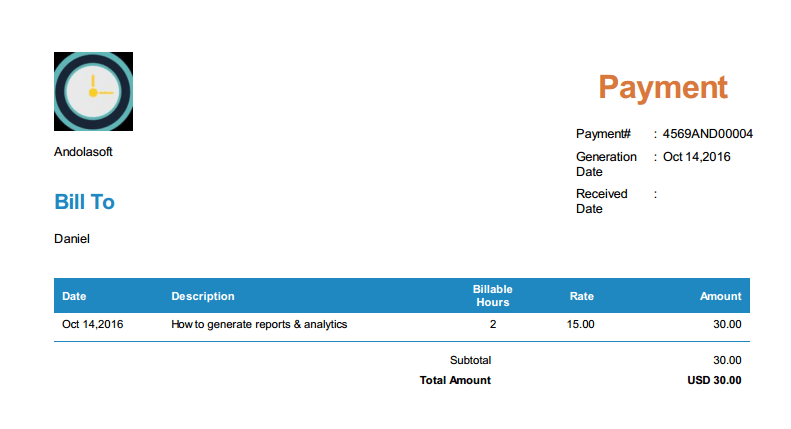
- When you will send Payment to your extended team’s email address, (s)he can view the email with amount, date & the payment PDF like the below screenshot.
- After you send the Payment, you can see the payment details in the Payment tab.

- On Payment tab, you can re-send the Payment, Download & Print the Payment PDF and Delete the Payment as well.
- Once you paid the amount you can mark it Paid by clicking on the Dollar icon ($) to close your deal.
- From the Payment page, you can see which payment is paid and which is not.


 (
( (
(